
Tutorial on Route Plans
This is the tutorial for Route Plans. It
explains creating, assigning, and completing a route plan. The below are the steps involved.
Step 1. Create Route Plan in Web App
- Navigate to Web App from the welcome screen and go to Routes module.
-
Now you'll see the Route Plans page. Click Create Route Plan
button.

-
The New Route Plan page appears with Google map on the screen. Enter
a name for the route plan in the Route Plan Name field. Click Add
Customer button on the top right corner to create a route plan.

Click the link Create Customer from the Web App to create a customer from the web app.
Click the link Create Customer from the Mobile App to create a customer from the EFFORT Plus mobile app.
-
Now a pop-up window appears with the list of customers in your
organization. Select the customers from the list and click OK to
create a route.

-
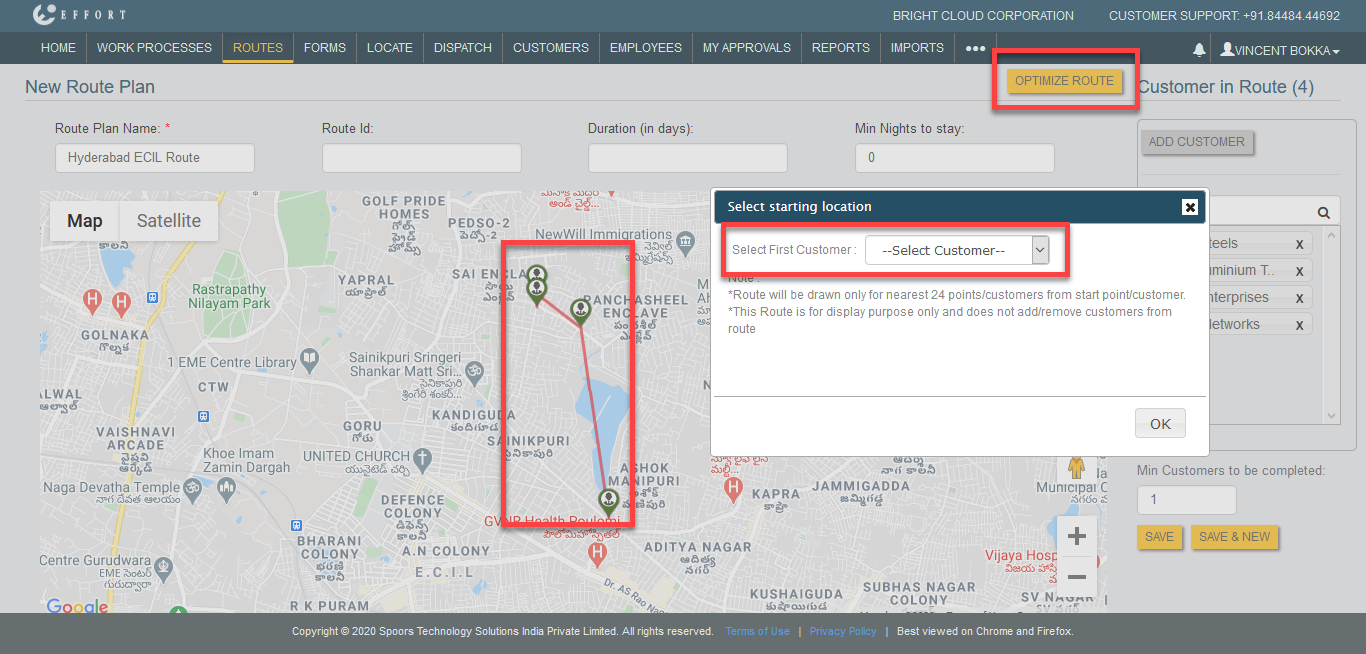
You'll see the selected customers on the Google map. Click Optimize
Route and select the first customer in the pop-up window to find the
shortest and most cost-effective route from the first customer to
others.
-
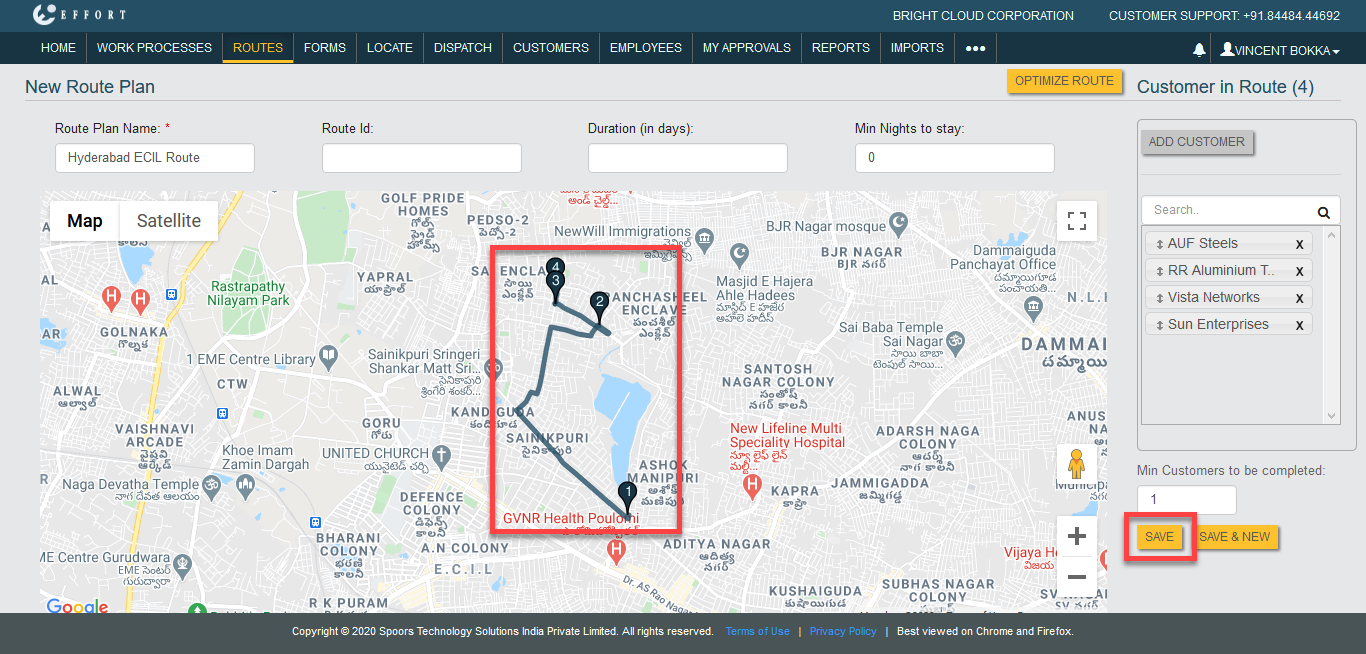
Now you'll see the optimized route on the Google map. If you are
comfortable with the route click Save.
-
With all customers added to the map, you're ready to start assigning to an
employee.You'll see the Route Plans page with the recently created
route. Click the assign icon
 to assign this route to the
employees.
to assign this route to the
employees.
-
A new window opens with the Assign Route Plan page. Select route
plan, employee, and date. Click the check box to set the route as a
recurring route. Configure recurring route options as shown below.
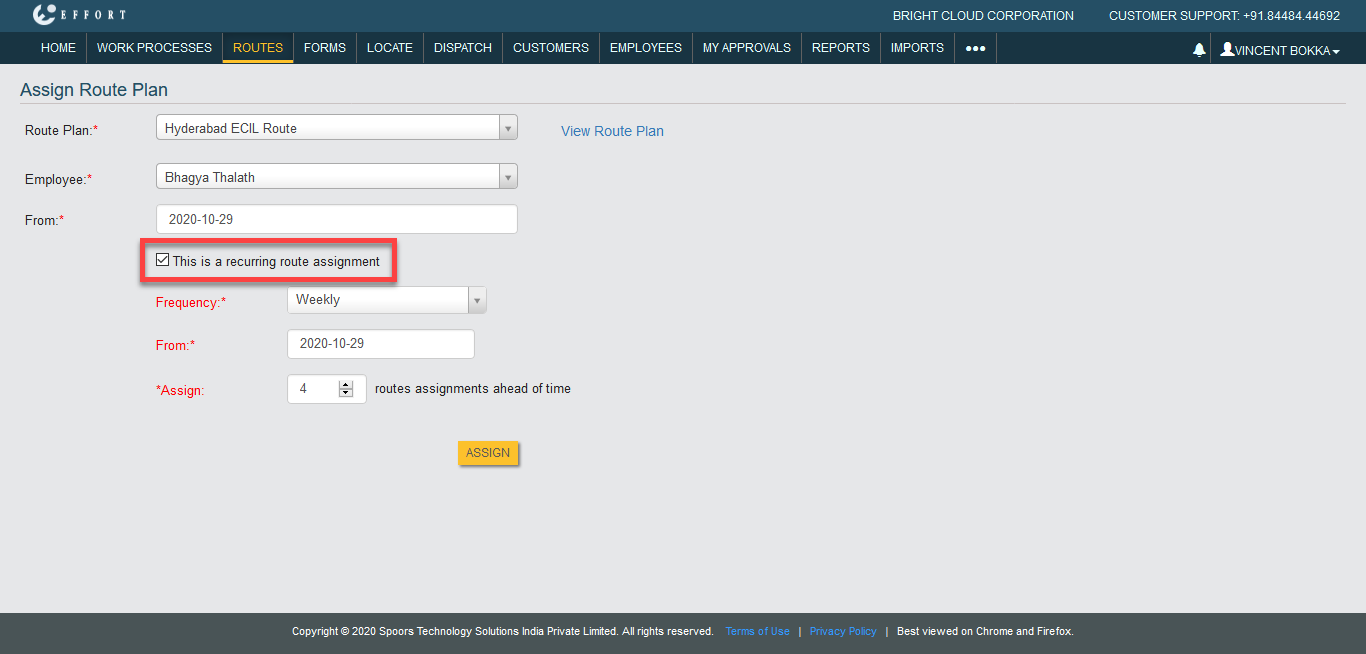
- Now you finished the Route plan creation and ready to get start with the mobile app. The employee receives the notification in his mobile app.
Step 2. Complete a Route Plan in Mobile App
-
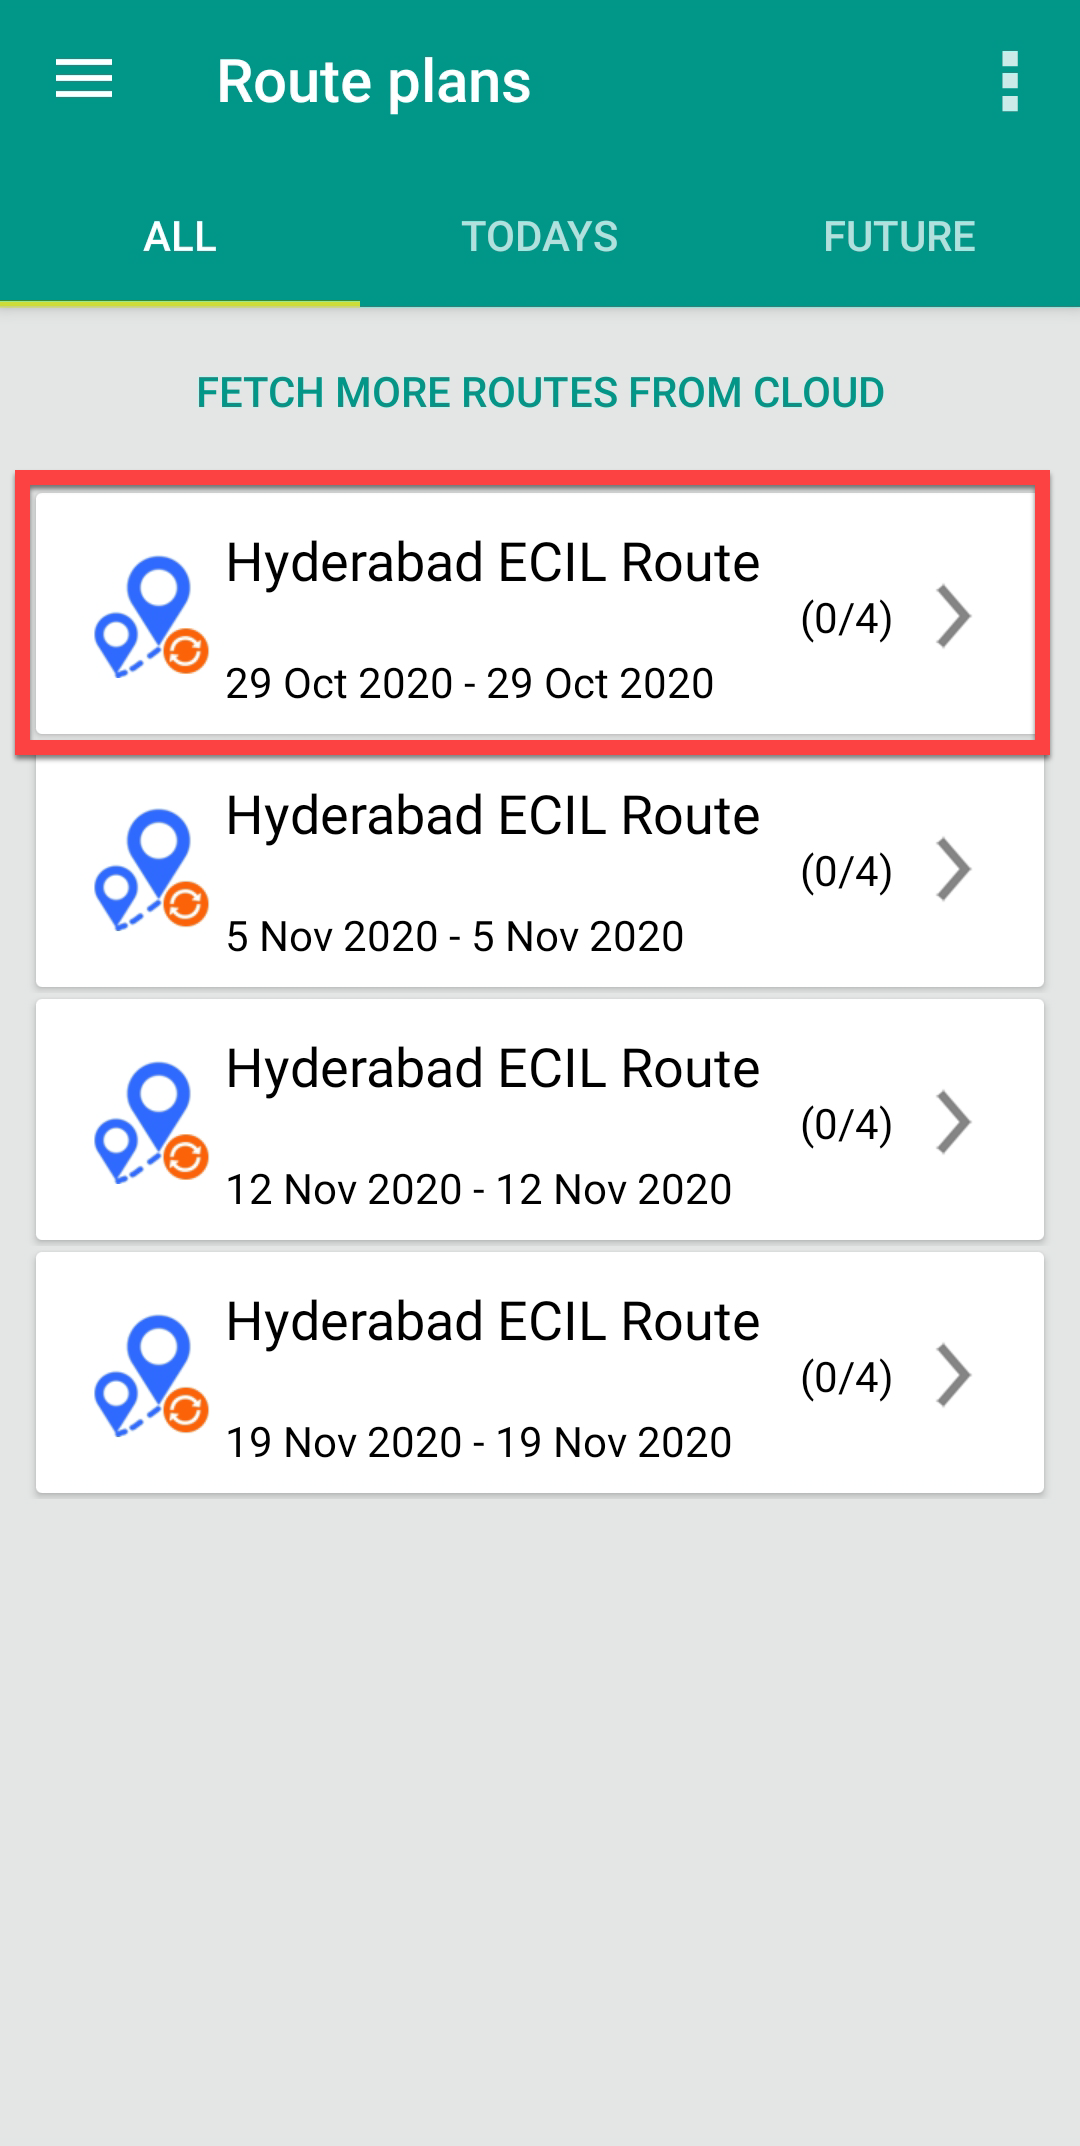
Open the EFFORT Plus app on your mobile. You'll see the number of
routes assigned to the employee on the Route plans card. Click on it
to carryout the activities.

-
Now you'll see all the route plans with date. Click the route plan.
-
You'll see all the customers in the route. Here you can add more customers,
reject route, view customers on the map, and sort. Click Add to
perform the activity.

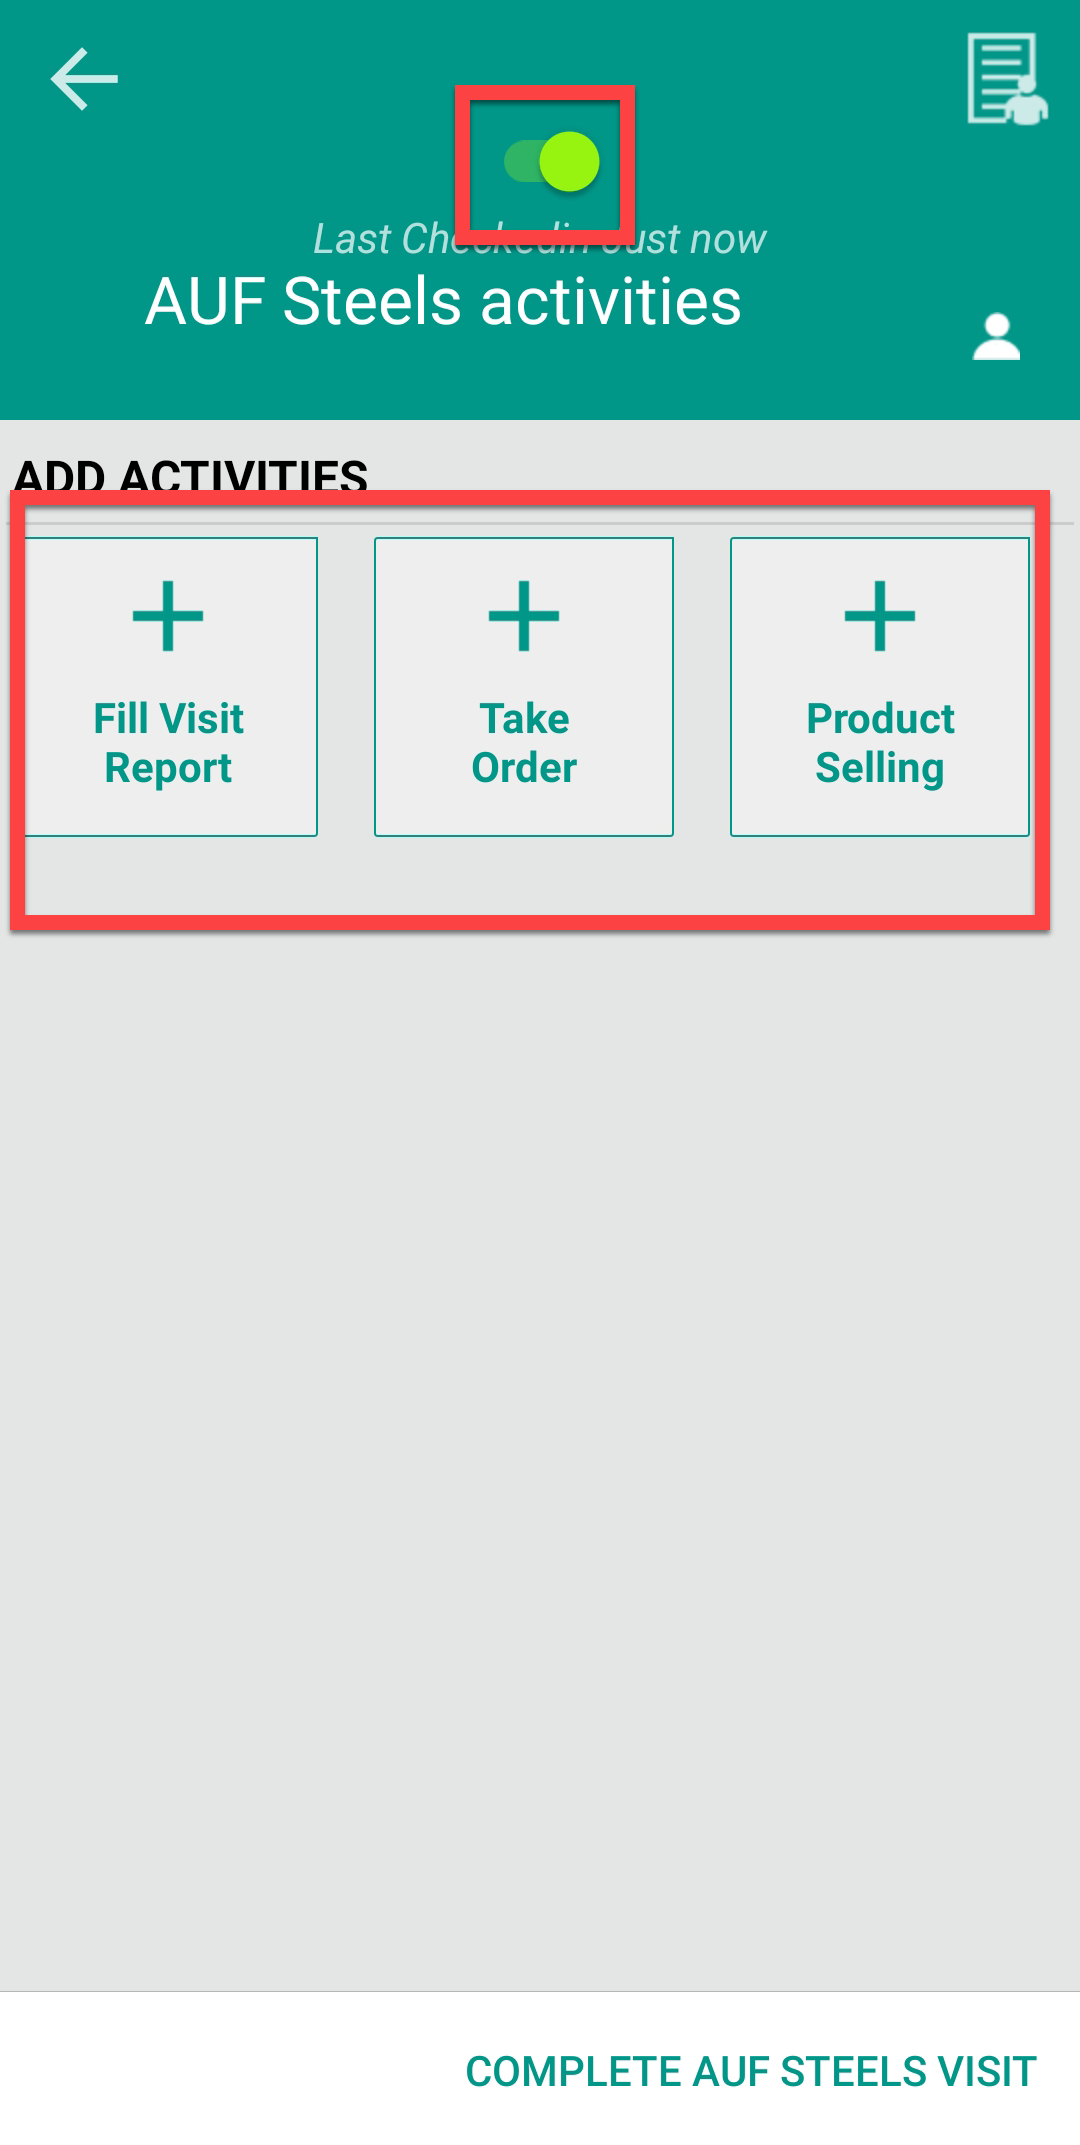
-
Check in to the customer. Tap activity and fill the form.
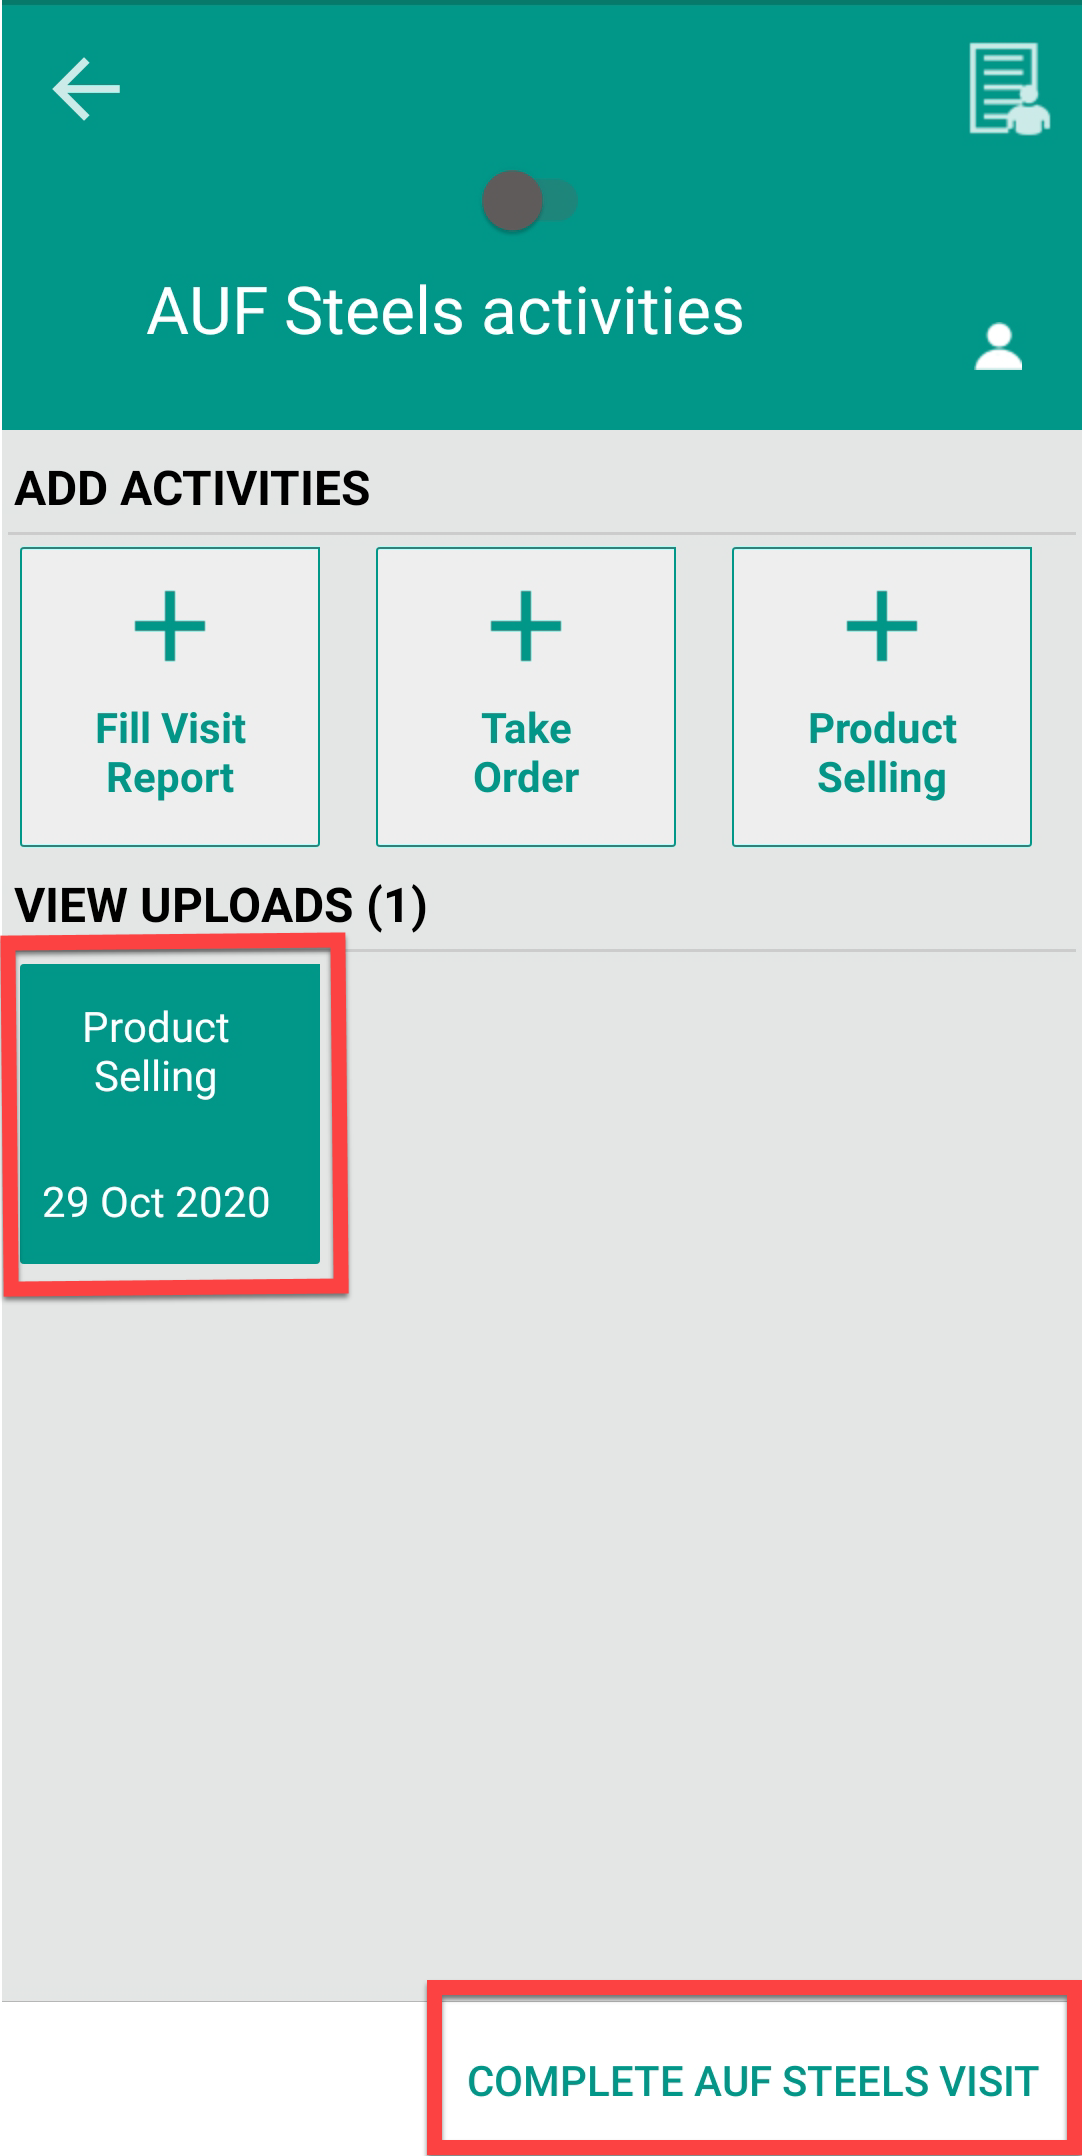
-
Now you can view the completed activity under view uploads section. Check
out the customer and tap Complete AUF STEEL Visit on the bottom of
the screen to complete the activity at the first customer.
-
You'll see a checkmark at the first customer which indicates that activity
is done successfully. Now click the location icon on the next customer card
to view the location of the customer. On the location page, you can also get
the driving directions from your location.
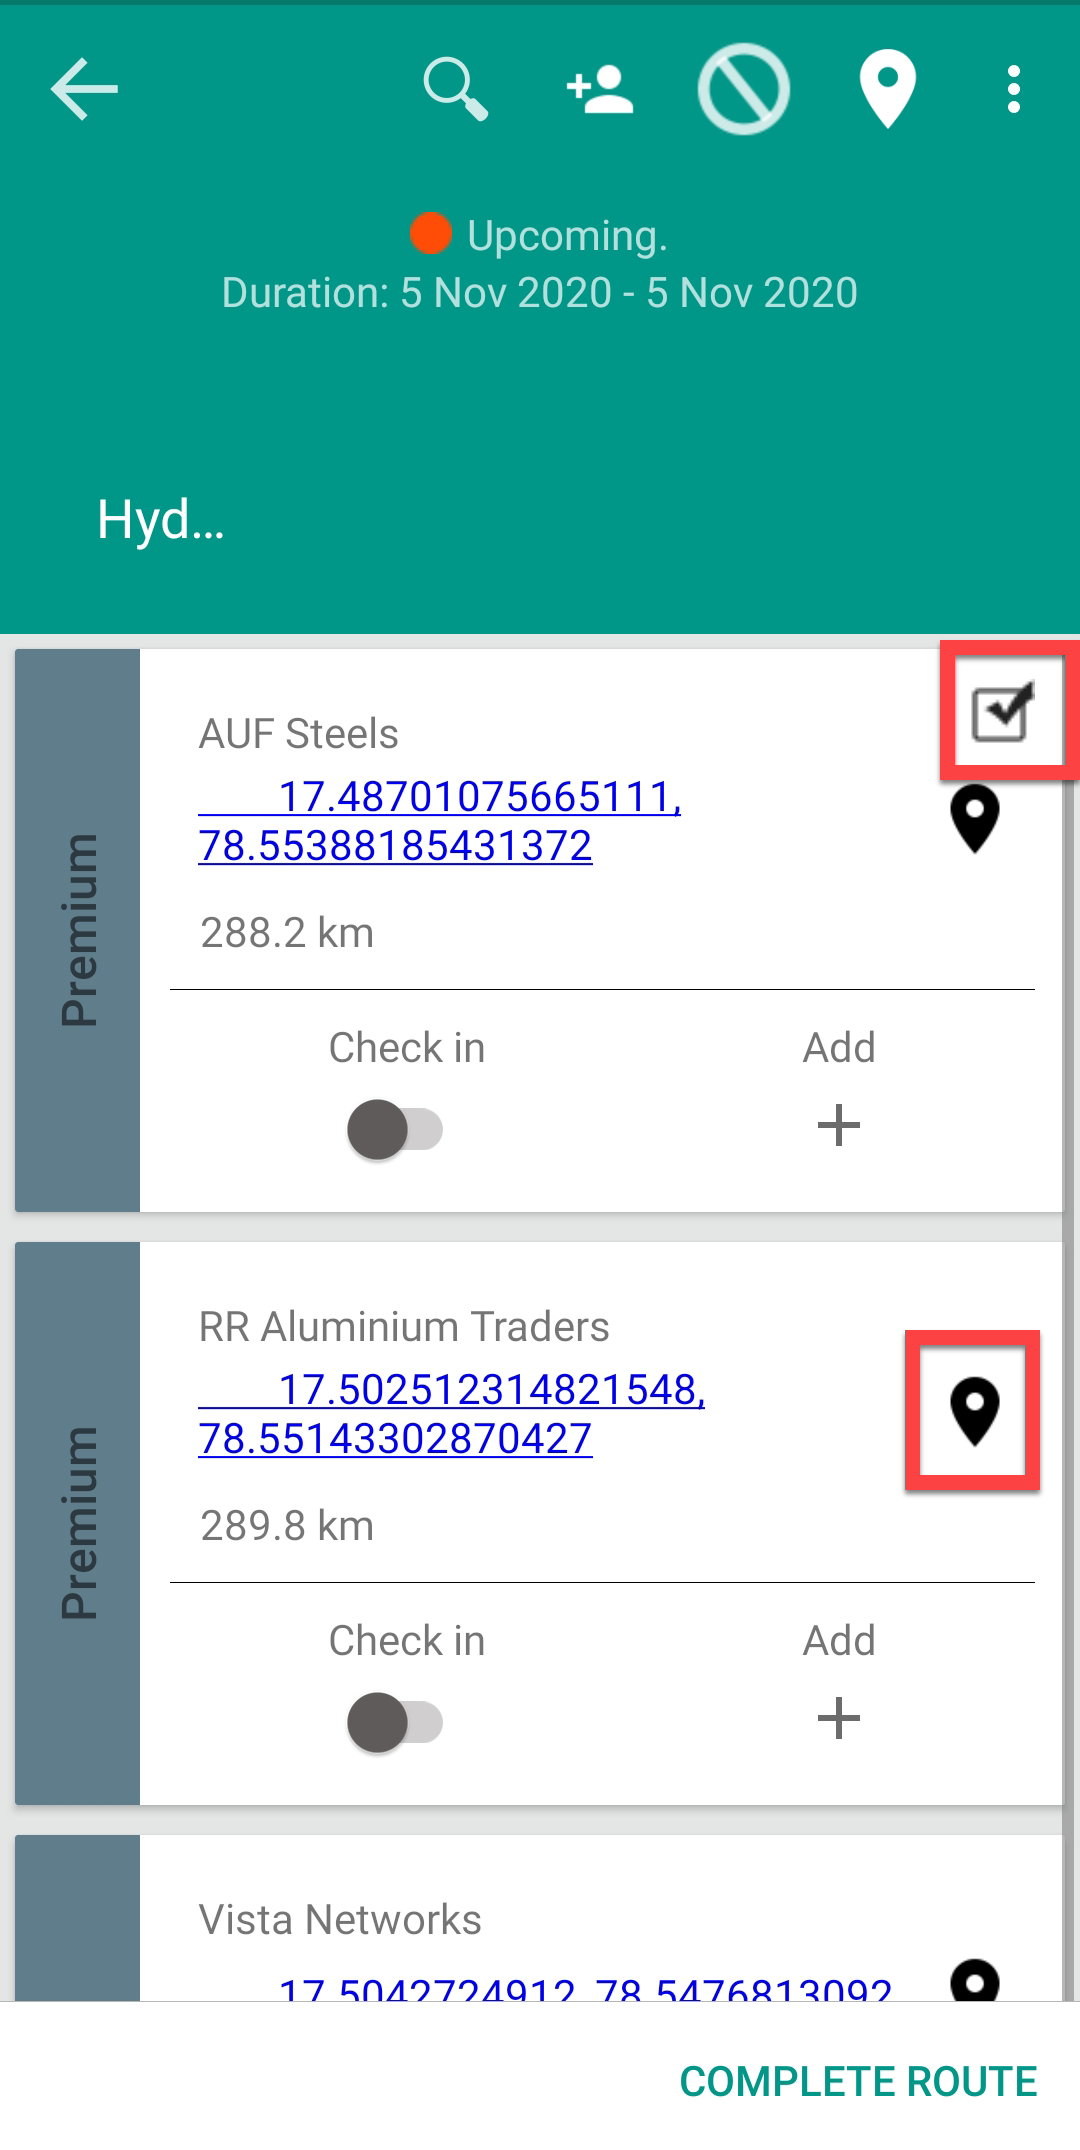
-
Repeat steps 3, 4, and 5 in this task to complete the activities for all
the customers. After completion of all the customers visit, tap Complete
Route on the bottom of the screen to complete the route plan.
