
Creation of Service Call Work Process
A work process can be defined as a series of steps completed to accomplish the tasks that result in some output. A set of steps that leads the team towards its goals, namely efficiency, effectiveness, and satisfaction. Consists of a collection of interrelated activities, performed by a number of employees to accomplish a particular goal. For example, a customer requested service for the recently purchased product through a toll-free number, you need to collect the service details from the customer. After collecting the details, a field technician will have to visit the customer location to carry out the service. You can call the customer for feedback after completion of the service. These are the steps involved in a sample service process. These steps are automized with the EFFORTx platform and executed to complete the service.
This work process tutorial will help you learn more about the Process Actions, Workflows, and how to add works through the web app. The below are the steps involved for creating a sample service call work process.
Step 1. Create Work Process
Whenever your customer requests a service through call, you need to create a work order against the customer. This section explains how to create a work process and the minimal steps required to create and schedule a work order in the EFFORT platform.
- Simply head over to to create a work process.
-
Enter the title as Service Call in the Work Process Name
field.
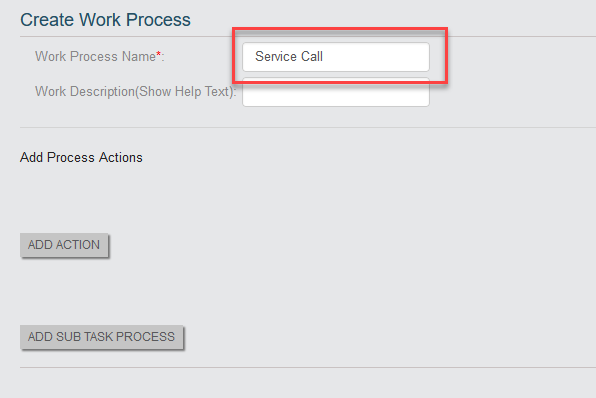
-
After you enter the title, click the Add Action button to define the
actions that need to be executed in the order in which they appear in the
Create Work Process screen.

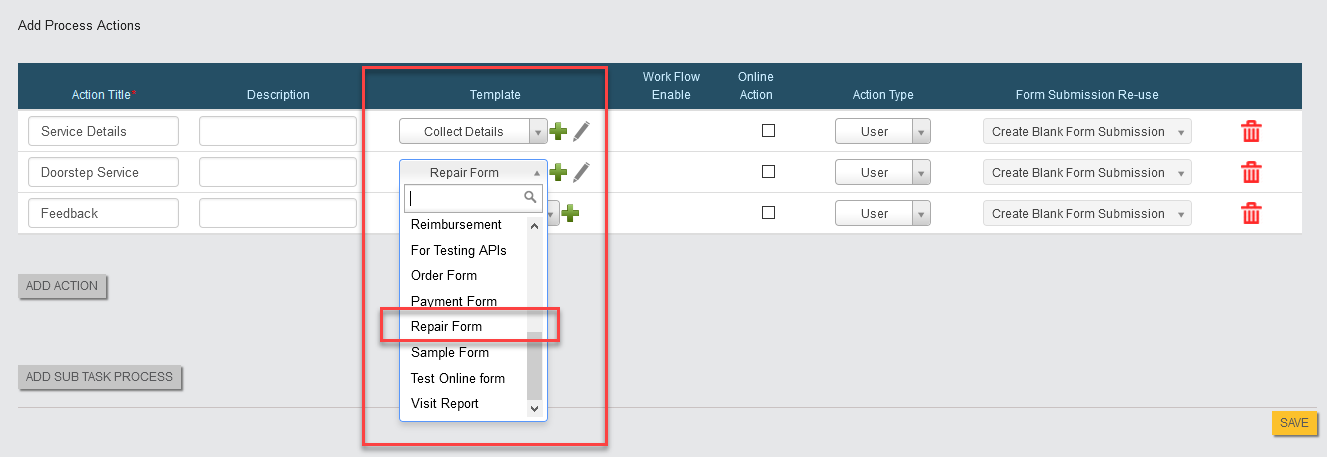
-
Now enter titles to each action in the Action Title field. The
action titles are Service Details, Doorstep Service, and
Feedback.

-
You can configure an activity that needs to be executed at each action.
Click on dropdown under the Template column and select the Collect
Details form.

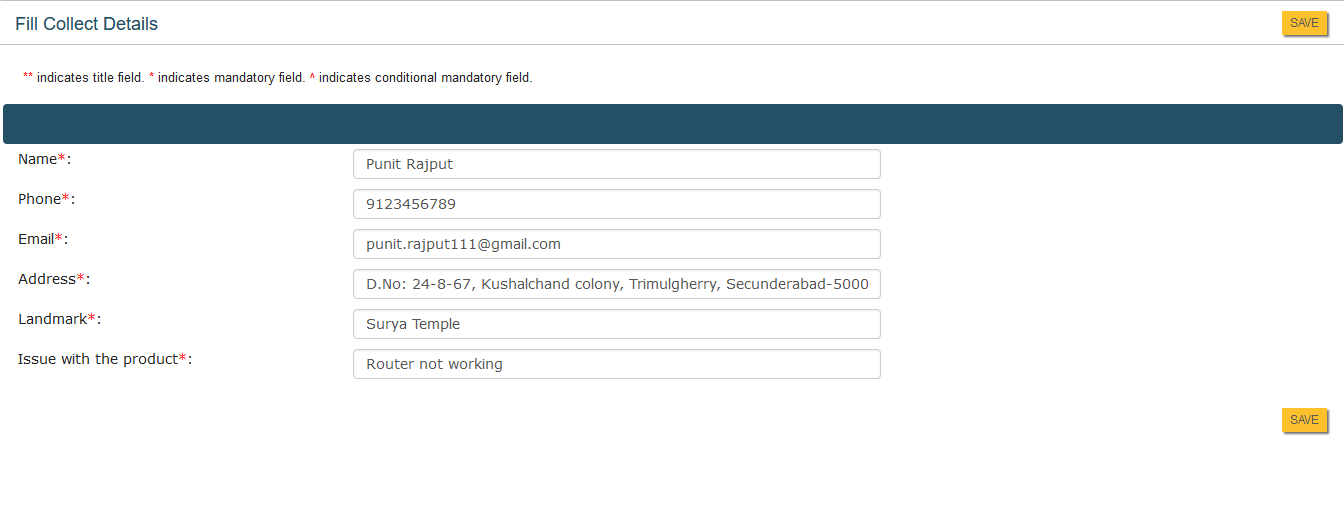
Here we configured the Collect Details form to the first action. After receiving a service request from the customer, the back office employee has to collect the required information as shown in the sample form.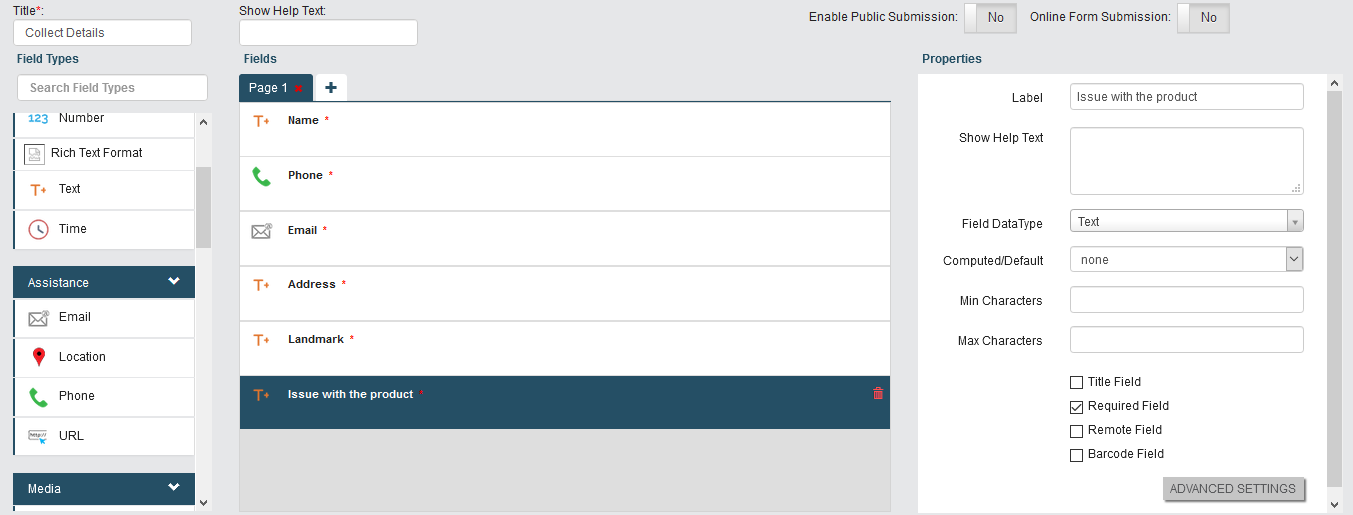 To create the Collect Details form, refer to Create a Form.
 -
Similarly, we have configured Repair Form to the Doorstep
Service action.
After collecting the required details from the customer, the field employee who is performing the second action must visit the customer's location. He must complete the service and need to fill the details in the form as shown below.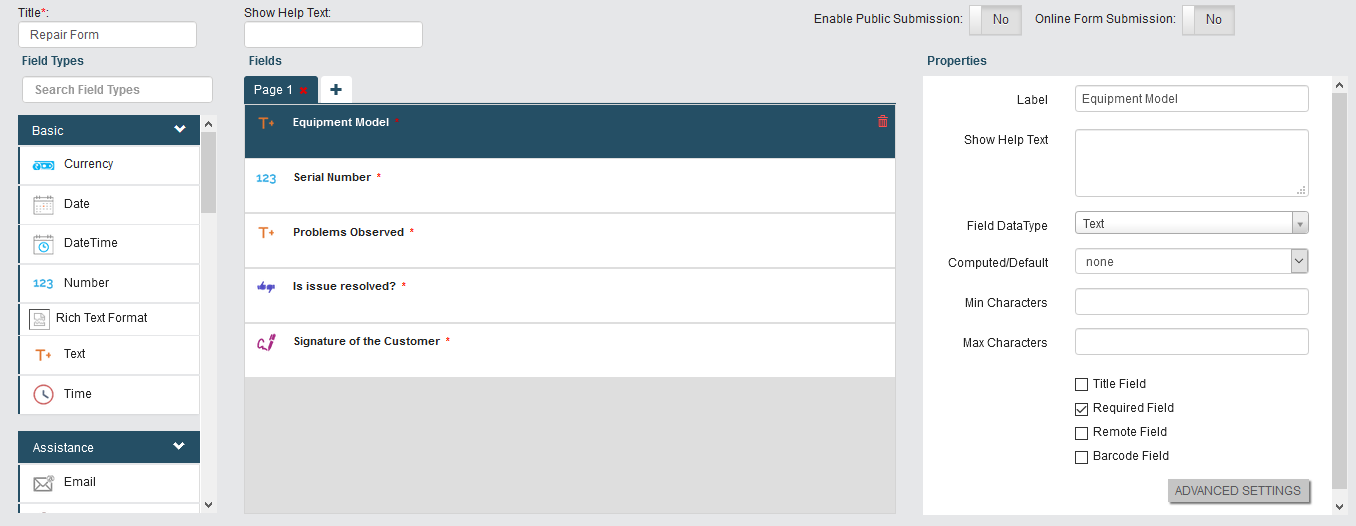
-
In the same way, configure Customer Feedback form to the third
action.

This is an optional action. If you want to listen to the feedback from the customer, you can keep this activity in the work process. The sample feedback form contains the fields as shown below.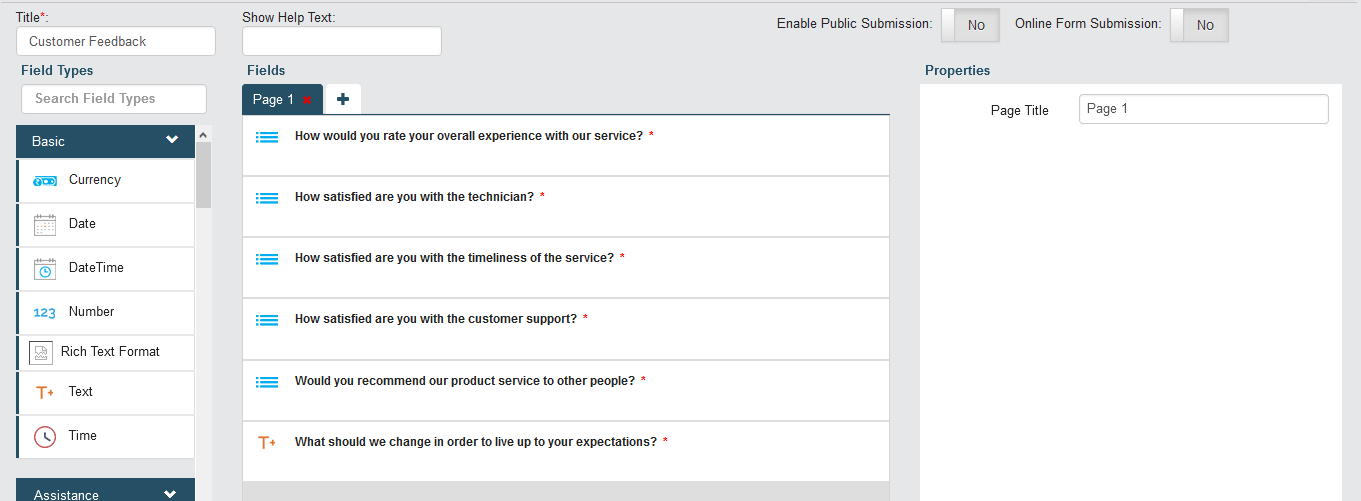
-
Click on the Save button to create a work process.

Step 2. Manage Flow
In the first step, we have created a work process with three steps or actions in it. In this section, we will configure the sequence of the actions and assign each step to particular employee group.
-
After saving the work process, the Service Call Process Actions page
is displayed. Click on the Manage Flow card to define the
workflow.

-
In this sample process, click the checkbox under the Start Action
column against Collect Details to configure it as starting action as
shown below.

-
Similarly, click the checkbox under the End Action column against
the Final Check to configure it as the finishing action as shown
below.

-
Click the pencil icon under the Next Actions to configure the next
action to be performed after this action.

-
Click on the bulb icon under Auto Allocate Work Actions to configure
each action to the employee group.

The Service Details action must be performed by the back office employees. Refer to the screenshot below. The Doorstep Service action must be performed by the field employees. Refer to the screenshot below.
 The Feedback action must be performed by the back office employees. Refer to the screenshot below.
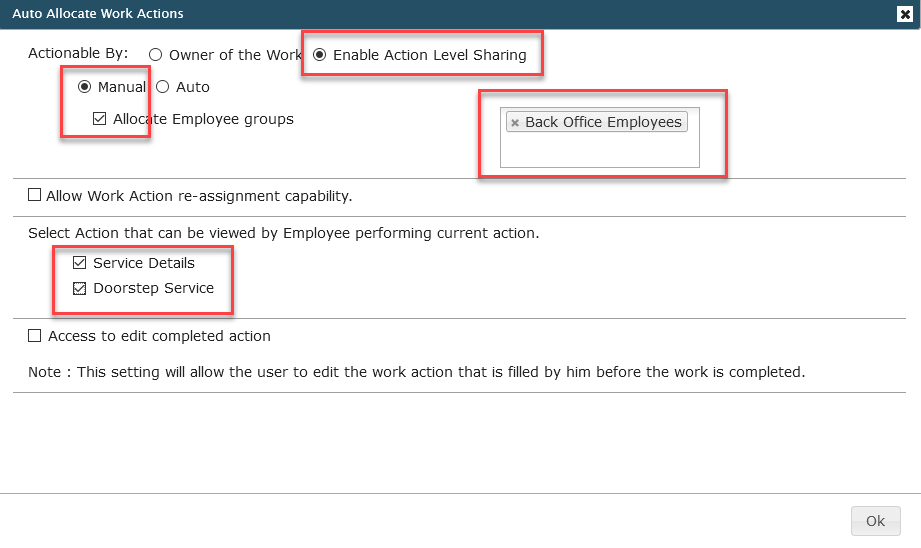
- Click on the Save Process Flow button to save the configuration.
Step 3. Manage Fields
This section helps you to configure the fields that are required to create a work.
-
After saving the workflow, the Process Actions page is displayed
again. Click on the Manage Fields card to define the field that are
required to create a work.

-
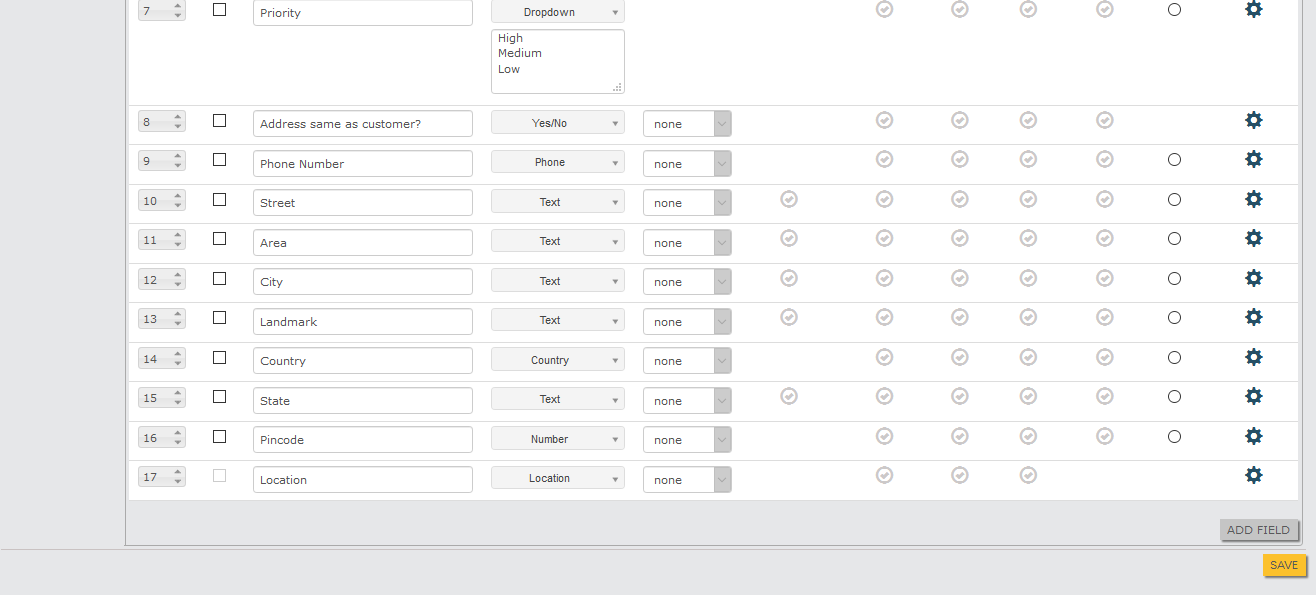
Various fields appear for work creation. Choose the required fields and
give the appropriate options. For this sample process, the configuration is
shown below.

- Click on the Save button to save the configuration.
-
Go to to make this work process visible in the mobile app. Scroll
down to the Wok Processes section and enable the checkbox against
Service Call.

Step 4. Add Work
In the above three steps, we created the work process for the service call. In this step, we will create a work order after receiving a service request from the customer.
-
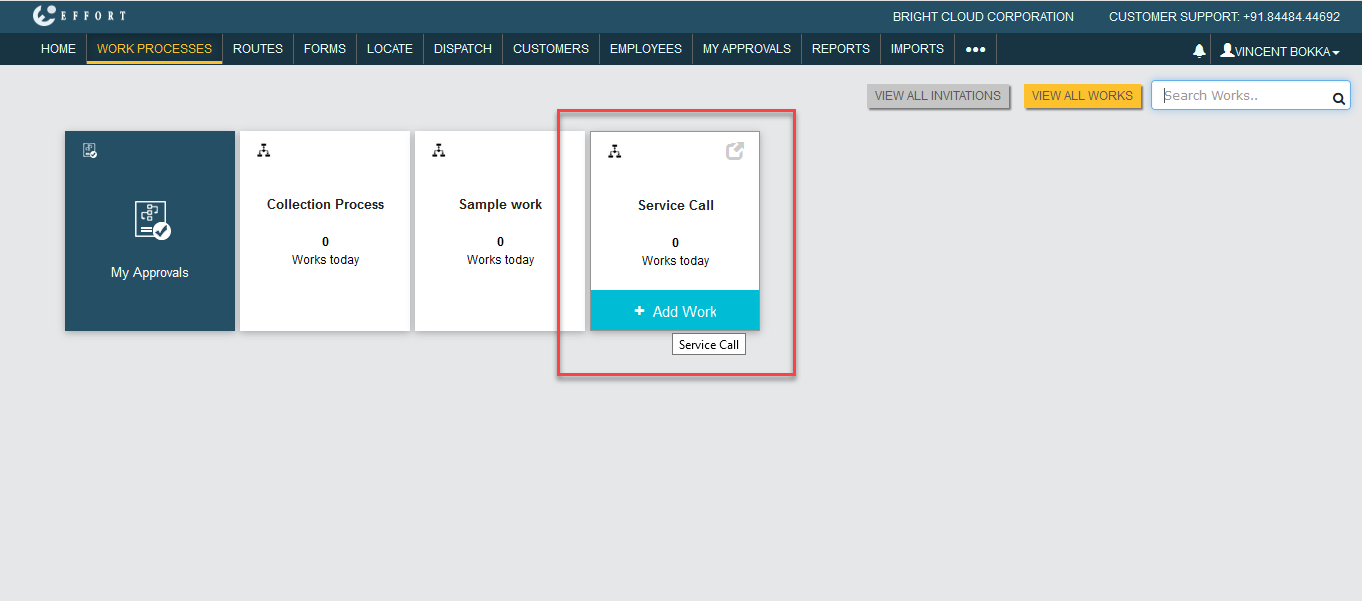
Go to . Move your cursor towards Service Call Process card
and click on Add Work.
-
Fill out the mandatory details such as Work Name, Description, Starts,
Ends, and Customer and click on the Save & Map Actions
button to assign actions to employees.

-
Select the employee for each from the dropdown under Assign To
column.

In the above image, the first and the last action is assigned to Vincent Bokka, who is a back-office employee, and the second action is assigned to Bhagya Thalath, who is a field employee.
Step 5. Complete First Action
In this we will show you about how to complete the first action.
-
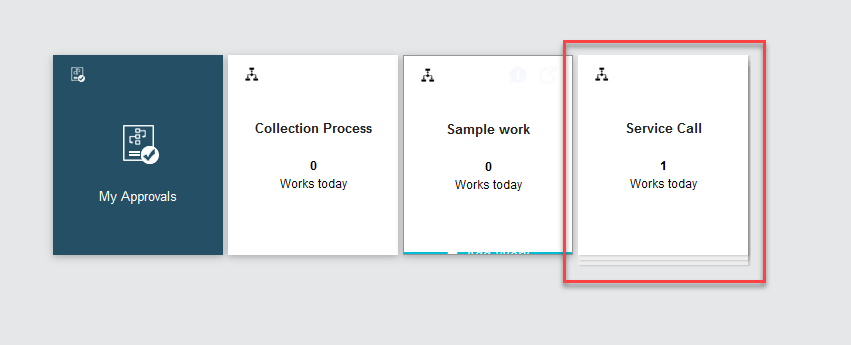
Go to . Click on the Service Call card to complete the
activity.
-
Click on the Service Details link under Next Activity column
to perform the activity.

-
Fill out the Collect Details form which is configured to the first
action and click Save.
- After saving the Collect Details form, the next action notification will be sent to the employee who is assigned to the second action.
Step 6. Complete Second Action
This section helps you to perform the second action which is assigned to the field employee through the mobile app.
-
Open the EFFORT Plus mobile app and click on the Service Call
card.

-
Now, tap the Service Request card to perform the activity.

-
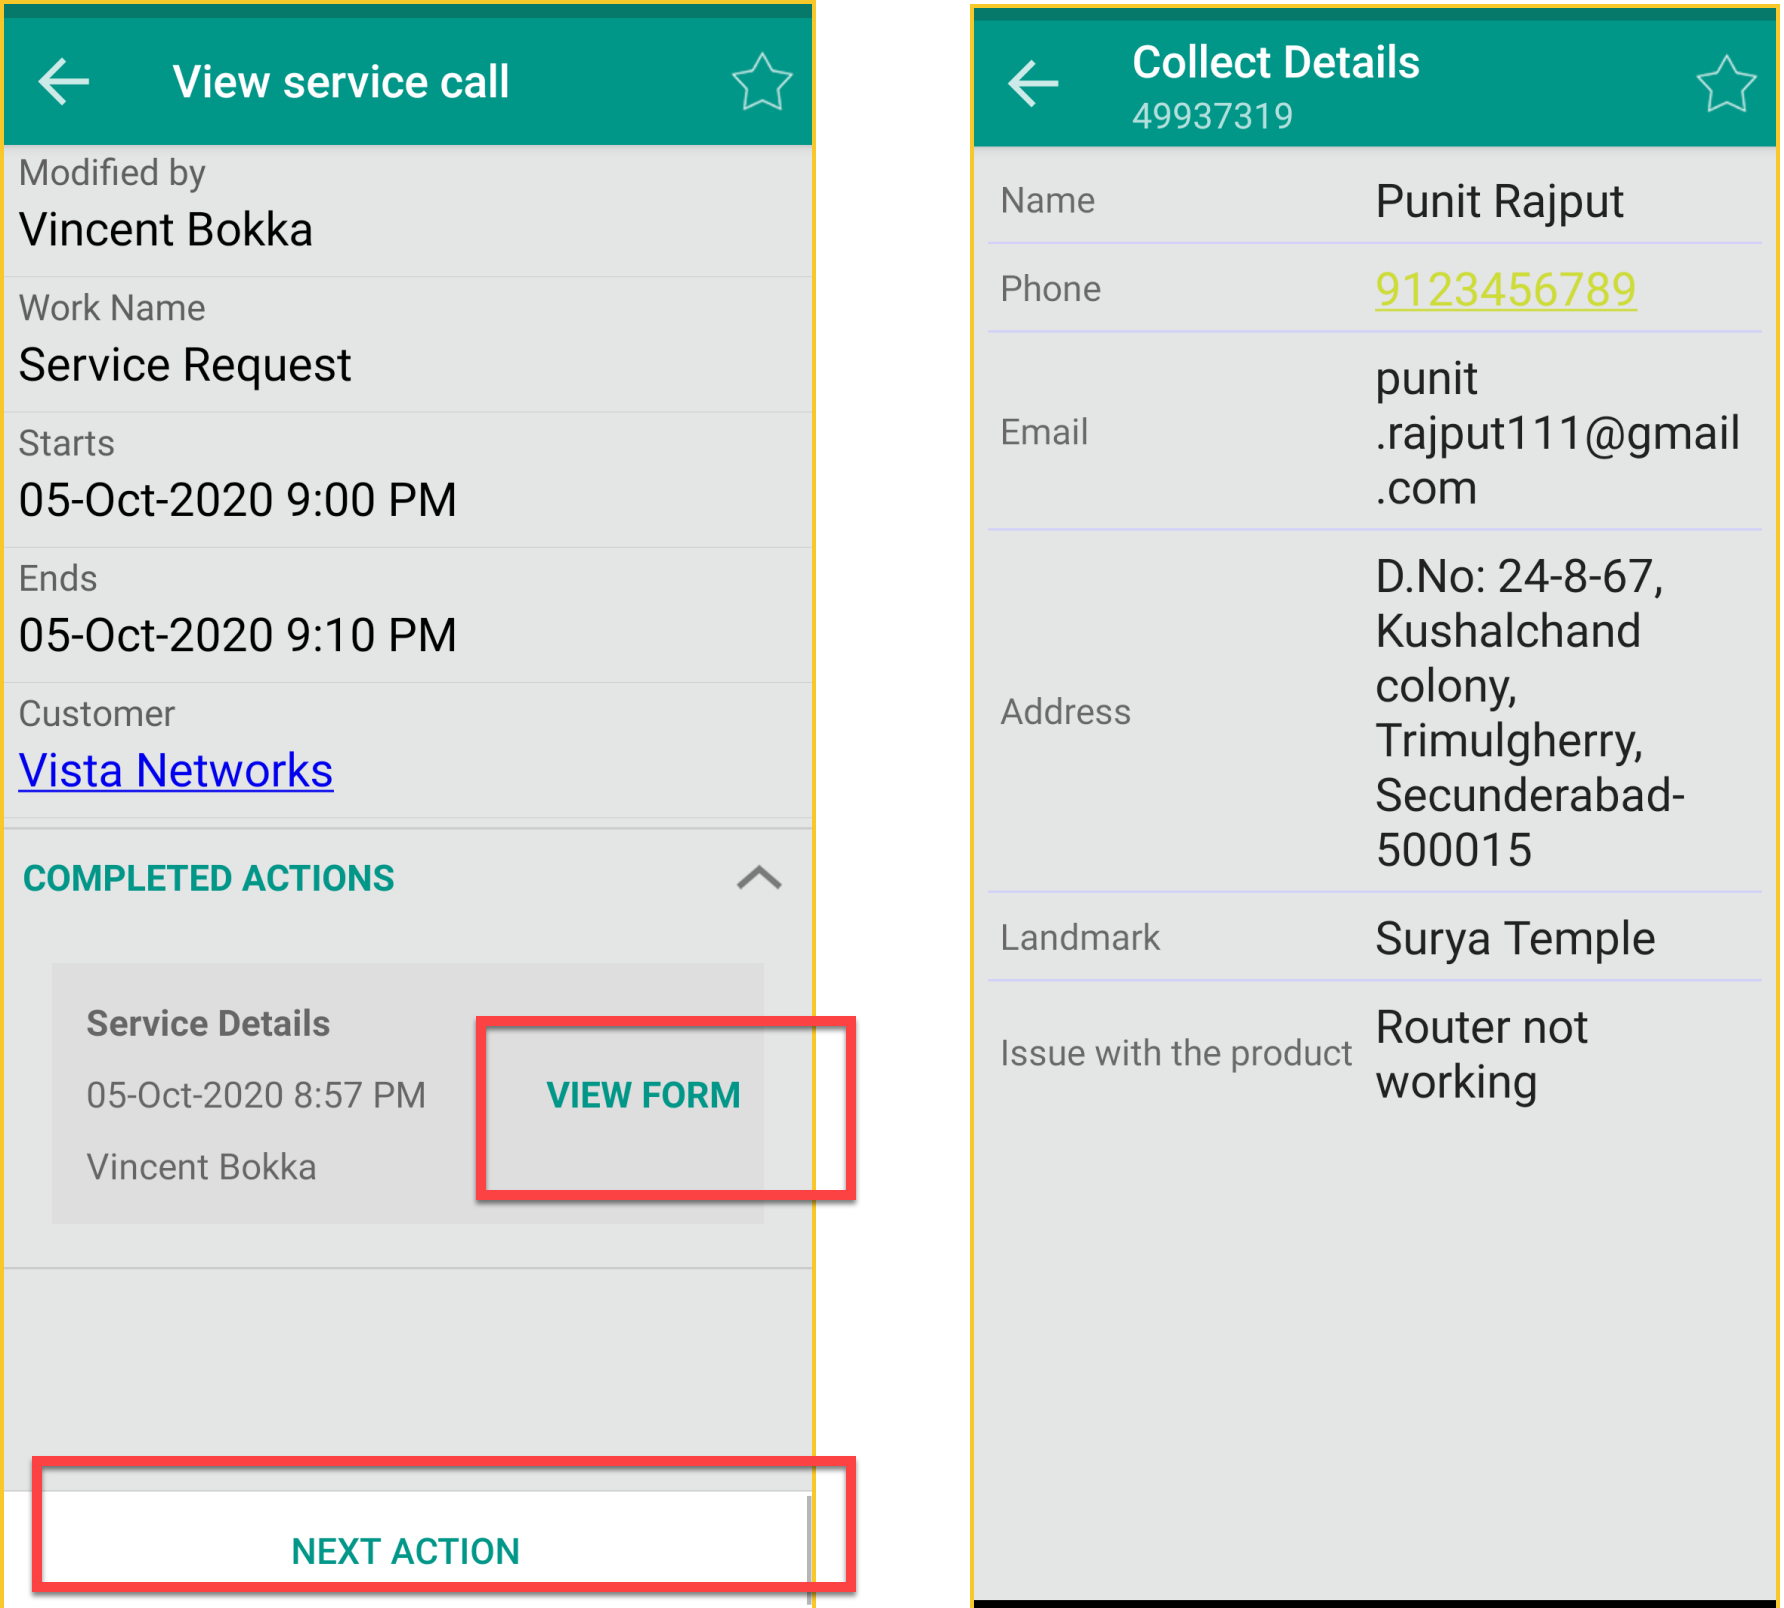
Click on the View Form to view the details collected in the first
action. Tap Next Action button to perform the activity.
-
Fill out the Repair Form which is configured to the second
action.

-
The Doorstep Service is completed by the field employee.

Step 7. Complete Third Step
In the above two steps, the service request was completed. In this section we need to call the customer for the feedback. This action is assigned to the back office employee.
-
Go to . Click on the Service Call card to complete the
activity.
-
Click on the Feedback link under Next Activity column to
perform the activity.

-
Fill out the Customer Feedback form which is configured to the third
action and click Save.

Step 8. View the Completed Actions
This section helps you to view the performed actions in the web app.
-
Go to . Click on the Service Call card to view the
activity.
-
Select Completed Works from the dropdown beside Service Call.

-
Click the view icon or ID or work name to view the completed actions.

-
You will find the Work Details and Actions Performed.
