
Configure Kanban View
To create a Kanban view follow the steps:
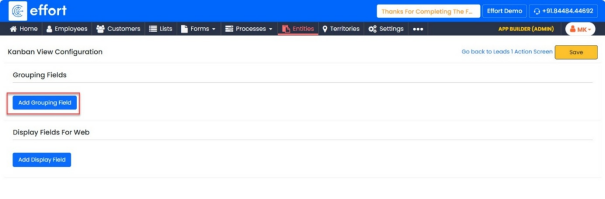
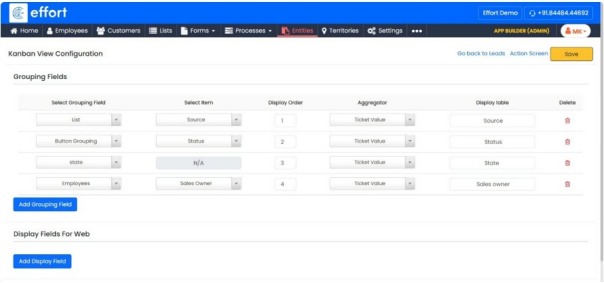
Path: App Builder -> Entities -> Leads -> Kanban view configuration
- Click on Entities.
- Click on Manage Entities.
- Select the “Lead” in Active Entities.
- Select the “Kanban view Configuration”.
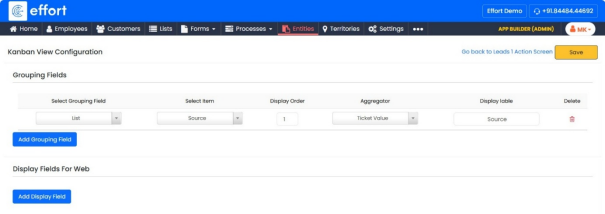
- Click on “Add Grouping Field”.
- Select Grouping Field, From the dropdown, select “List”.
- Select Item, click on the dropdown and select Item as “Source”.
- Set the Display Order 1.
- Select Aggregator, click on the dropdown and select “Ticket Value” as the aggregator.
- Enter Display label as “Source”.
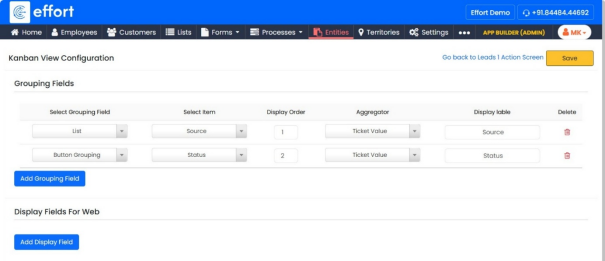
- Click on “Add Grouping Field”
- Select Grouping Field, From the dropdown, select “Button Grouping”.
- Select Item, click on the dropdown and select Item as “Status”.
- Set the Display order 2.
- Select Aggregator, click on the dropdown and select “Ticket Value” as the aggregator.
- Enter Display label as “Status”.
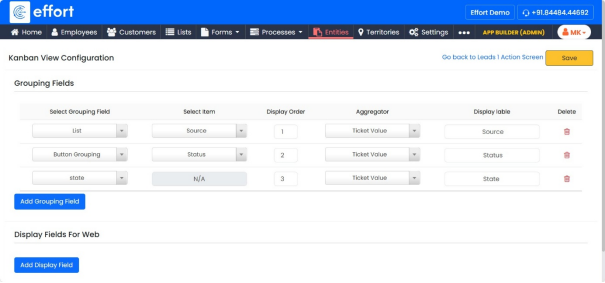
- Click on “Add Grouping Field”
- Select Grouping Field, From the dropdown, select “State”.
- Set the Display order 3.
- Select Aggregator, click on the dropdown and select “Ticket Value” as the aggregator.
- Enter Display label as “State”.
- Click on “Add Grouping Field”
- Select Grouping Field, From the dropdown, select “Employees”.
- Select Item, click on the dropdown and select Item as “Sales owner”.
- Set the Display order 4.
- Select Aggregator, click on the dropdown and select “Ticket Value” as the aggregator.
- Enter Display label as “Sales owner”.
- Display Fields For web.
- Click on “
 ” icon to add the display fields, as shown in the
figure.
” icon to add the display fields, as shown in the
figure. - Click on dropdown and select the “Company Name”.
- Click on “
 ” icon, then open the dropdown and select “Contact
Person”.
” icon, then open the dropdown and select “Contact
Person”. - Click on “
 ” icon, then open the dropdown and select “Ticket
Value”.
” icon, then open the dropdown and select “Ticket
Value”.
- Click “Save”.