
Work Fields - Data Types
| Data Type | Description |
|---|---|
| Audio |
The Audio data type allows you to submit an audio input, either by recording
or by uploading an audio file that's stored in their device (computer,
phone, or tablet). From the Web App, you can only upload an audio file. The
below image shows how an Audio field appears on the work creation screen
when you access it from the Web App:
 |
| AutoGenerate |
The AutoGenerate data type helps you generate a sequential code post the work
creation with a custom-defined prefix. The below image shows how an
AutoGenerate field appears on the work creation screen when you access it
from the Web App. It looks like a grey box and doesn't allow entering
inputs.
 |
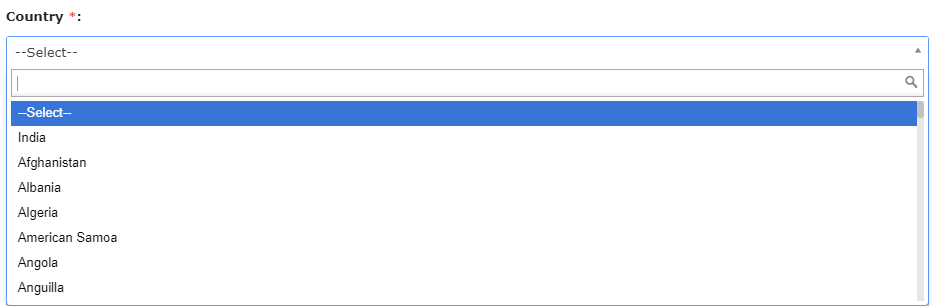
| Country |
The Country data type allows you to select a country from the predefined
countries list. The below image shows how a Country field appears on the
work creation screen when you access it from the Web App:
 |
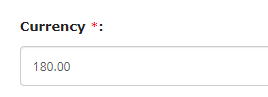
| Currency |
The Currency data type allows you to enter a monetary amount in a particular
currency. You can manage the decimal values to be entered and add the up and
down arrows to quickly adjust the values. The below image shows how a
Currency field appears on the work creation screen when you access it from
the Web App:
 |
| Custom Entity |
The Custom Entities are Masters to capture information of
businesses/customers. The Custom Entity data type allows you to select items
from the created entity. (To create a custom entity, go to ). You can also perform check-ins, check-outs at entity
locations, and perform entity specific activities based on configurations.
The below image shows how a Custom Entities field appears on the work
creation screen when you access it from the Web App:
 |
| Customer |
The Customers are the people/organizations with whom you do business. The
Customer data type is a Master which allows you to select a customer who are
mapped to them. You can perform check-ins, check-outs at customer locations,
and perform customer activities based on configurations. To Modify Customer
Master and Activities, go to . The below image shows how a Customer field appears on the
work creation screen when you access it from the Web App:
 |
| Customer Type |
The Customer Type data type allows you to select a customer type that is
mapped to them and also allows you to filter the customers based on their
type. To create a customer type, go to . The below image shows how a Customer Type field appears on
the work creation screen when you access it from the Web App:
 |
| Date |
The Date data type allows you to select a date value from the date picker.
The below image shows how a Date field appears on the work creation screen
when you access it from the Web App:
 |
| Datespan |
The Datespan data type helps you to calculate the duration between two-date
fields. For this, you need two Date fields and enter the formula in the grey
box provided below the Computed/Default field. The below image shows how a
Datespan field works while creating the work.
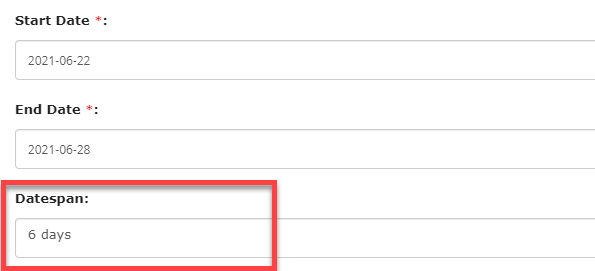 As shown in the above image, the value in the datespan field gets calculated automatically based on the Start Date and End Date fields. |
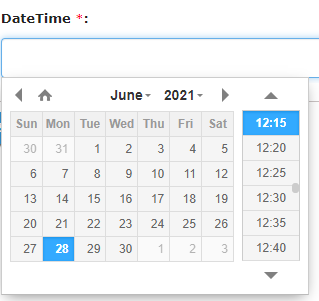
| DateTime |
The DateTime data type allows you to select a date value as well as a time
value. The below image shows how a DateTime field appears on the work
creation screen when you access it from the Web App:
 |
| DateTimespan |
The DateTimespan data type helps you to calculate the duration along with
minutes between two-DateTime fields. For this, you need two DateTime fields
and enter the formula in the grey box provided below the Computed/Default
field. The below image shows how a DateTimespan field works while creating
work.
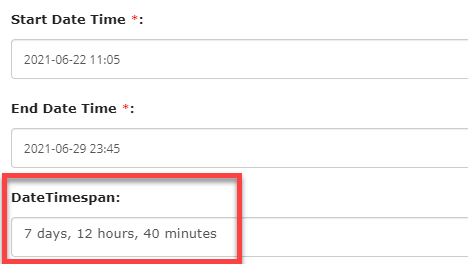 As shown in the above image, the value in the DateTimeSpan field gets calculated automatically based on the Start Date Time and End Date Time fields. |
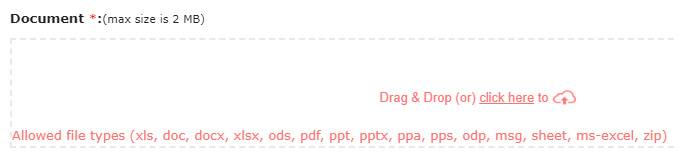
| Document |
The Document data type allows you to upload a file while creating work. You
can also enforce size restrictions. The supported formats are pdf, doc, xls,
etc. The below image shows how a Document field appears on the work creation
screen when you access it from the Web App:
 |
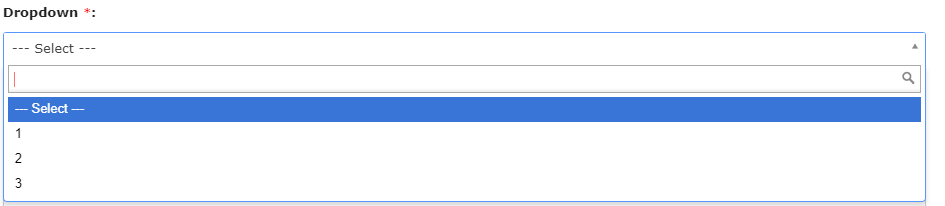
| Dropdown |
The Dropdown data type allows you to select a value that is displayed in a
dropdown menu. You need to define values in the text box given below the
field. Additionally, you can show the values as radio buttons and set the
default value. The below image shows how a Dropdown field appears on the
work creation screen when you access it from the Web App:
 |
| Duration |
The Duration data type enables you to input durations or time intervals, such as hours, minutes, and seconds. In the Web App, the Duration field appears as shown in the image below:  |
|
The Email data type allows you to enter a valid email address. It validates if the email address entered is in the format: yourname@domain.com. The below image shows how an Email field appears on the work creation screen
when you access it from the Web App:
 |
|
| Employee |
The Employee data type allows you to select an employee. If the user is a
manager, then all the reporting employees will appear in the dropdown. If
the user is not a manager, by default, it shows the employee who is creating
work. The below image shows how an Employee field appears on the work
creation screen when you access it from the Web App:
 |
| Form |
The Form data type allows you to select a form template. You must select a
form template in the dropdown given below the field and the users can select
only the submissions of the form that you configured here. Use this data
type if you want the users to attach a previous form submission for
reference. The below image shows how a Form field appears on the work
creation screen when you access it from the Web App:
 |
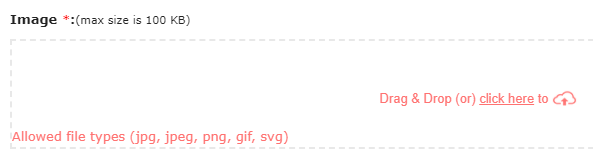
| Image |
The Image data type allows you to capture or upload an image while creating
work. Additionally, you can enable compression and enforce size
restrictions. The below image shows how an Image field appears on the work
creation screen when you access it from the Web App:
 |
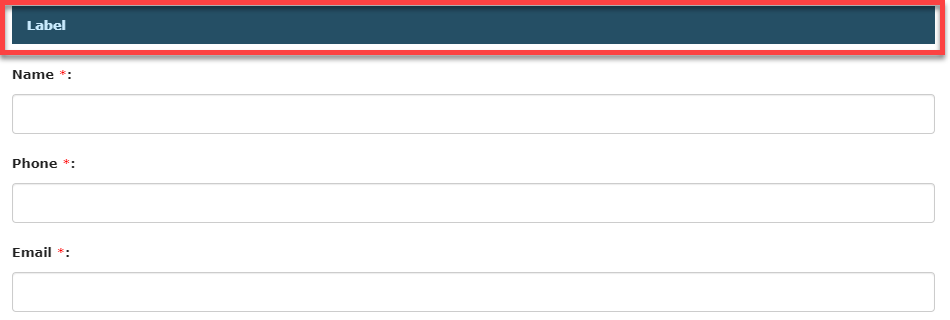
| Label |
The Label data type looks like a header and enables you to represent the
purpose or objective of the fields which you add below this data type. Use
this data type to categorize the relevant fields in the work. The below
image shows how a Label field appears on the work creation screen when you
access it from the Web App.
 |
| Location |
The Location data type allows you to enter valid latitude and longitude
values or select a location from the map. You can also restrict the users to
select a location from the map only. The below image shows how a Location
field appears on the work creation screen when you access it from the Web
App:
 |
| Location Diff |
This data type helps you calculate the distance between two locations. To do this, you need to add two location data types and one location difference data type. To calculate the distance, you need to define the formula in the grey box located under the Computed field. Refer to the following screenshot for a sample configuration.  Here is the formula defined below.
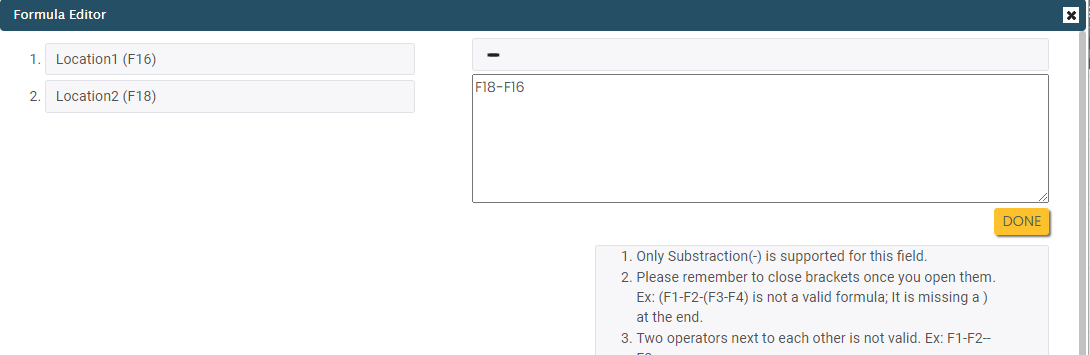 Refer to the following screenshot to see how it works.
 The difference between location1 and location2 is displayed automatically in the location difference field. |
| Location to Address | This data type allows you to display the address of the selected location.
To do this, you need to add one location data type and one location to address
data type. Under the Computed column, you need to select the location field from
which you want to get the address. Refer to the following screenshot for a
sample configuration. Refer to the following screenshot to see how it works. 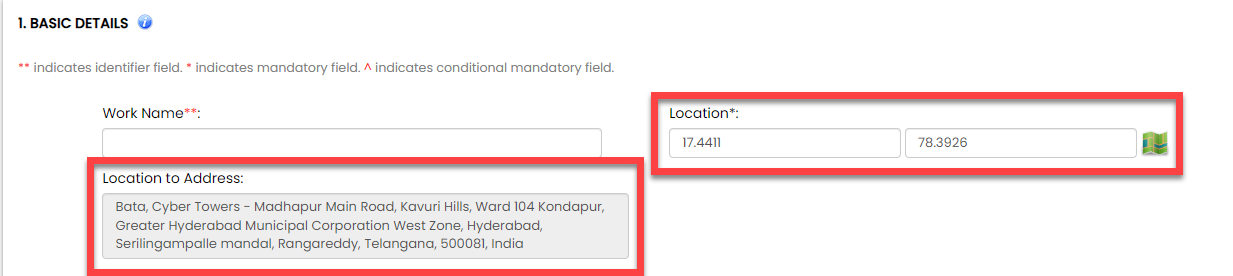 |
| Multi Document |
The Multi Document data type allows you to upload multiple documents in one
field. You can use this data type in your work to reduce the number of
Document fields and save the user's work submission time. The users can
upload a maximum of up to 5 documents in this field. The supported formats
are pdf, doc, xls, etc. The below image shows how a Multi Document field
appears on the work creation screen when you access it from the Web
App:
 Note: This data type works only when you access a work through the Web
App.
|
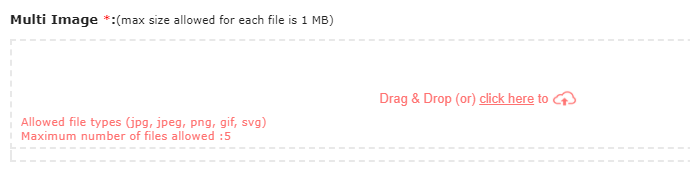
| Multi Image |
The Multi Image data type allows you to upload multiple images in one field.
You can use this data type in your work to reduce the number of Image fields
and save the user's work submission time. The users can upload a maximum of
up to 5 images in this field. The supported formats are jpg, jpeg, png, gif,
and svg. The below image shows how a Multi Image field appears on the work
creation screen when you access it from the Web App:
 |
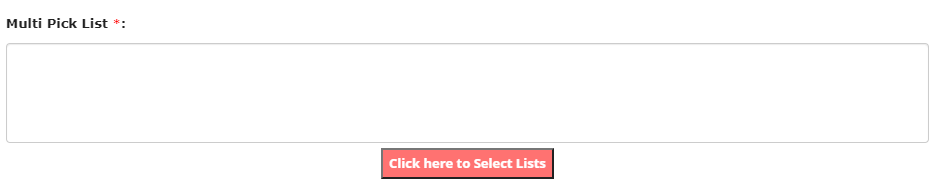
| Multi Picklist |
The Multi Pick List data type allows you to select one or more items from the
configured list master that are displayed in a dropdown. To create a list
master, go to . The below image shows how a Multi Pick List field appears on
the work creation screen when you access it from the Web App:
 |
| Multi Select Dropdown |
The Multi Select Dropdown data type allows you to select one or more values
that are displayed in a dropdown menu. You need to define values in the text
box given under the field. The below image shows how a Multi Select Dropdown
field appears on the work creation screen when you access it from the Web
App:
 |
| Number |
The Number data type allows you to enter an integer value, for example: -123,
-45, 0, 123, 1765, etc. You can manage the decimal values to be entered and
add the up and down arrows to quickly adjust the values. The below image
shows how a Number field appears on the work creation screen when you access
it from the Web App:
 |
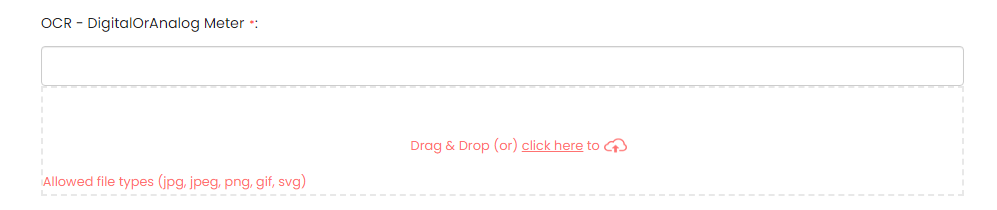
| OCR - Digital/Analog Meter |
The OCR - DigitalOrAnalog Meter data type enables the extraction of numerical
data shown on digital or analog meters using OCR technology. This feature
proves valuable in situations where manual meter reading is time-consuming
or prone to errors. When accessing this field through the Web App, simply
drag and drop or upload an image of the digital or analog meter. The meter
reading will be automatically populated in the field.
 |
| OCR - Number Plate |
The OCR - Number Plate data type enables you to recognize and extract
alphanumeric characters from vehicle number plates. This data type allows
for automated reading and interpretation of number plates, which can be
useful in various applications such as traffic monitoring, toll collection,
parking management, and law enforcement. When accessing this field through
the Web App, simply drag and drop or upload an image of the number plate.
The value will be automatically populated in the field.
 |
| Phone |
The Phone data type allows you to enter a valid phone number. You can enable
OTP based verifications to verify a phone number using OTP. The below image
shows how a Phone field appears on the work creation screen when you access
it from the Web App:
 |
| Picklist |
The Pick List data type allows you to select an item from the configured list
master that is displayed in a dropdown. To create a list master, go to . The below image shows how a Pick List field appears on the
work creation screen when you access it from the Web App:
 |
| Rich Text Format |
The Rich Text Format data type allows you to enter rich text, i.e., text that
is in the Rich Text Format (RTF). It supports multimedia files and
formatting such as font sizes and colors, bolding, italics, etc. The below
image shows how a Rich Text Format field appears on the work creation screen
when you access it from the Web App:
 Note: Rich Text is only supported on the Web App. Whereas in the mobile app,
it functions as a normal text field.
|
| Signature |
The Signature data type allows you to draw an electronic signature while
creating work. You can capture the photo and define terms and conditions to
which the user must accept while drawing a signature. To capture the photo,
go to Configurator->Settings->Global Mobile Settings->Form Settings. The
below image shows how a Signature field appears on the work creation screen
when you access it from the Web App:
 |
| Territory |
A Territory can have a set of customers in a geographical region and can be
mapped to employees. The Territory data type allows you to select a
territory that is mapped to them. To create a territory, go to . The below image shows how a Territory field appears on the
work creation screen when you access it from the Web App:
 |
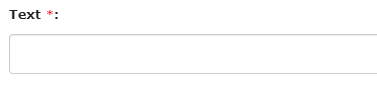
| Text |
The Text data allows you to enter plain text, i.e., letters from any
language, numbers, and special characters. You can validate the text using
regular expressions and use this field to generate a unique code for
internal purposes. The below image shows how a Text field appears on the
work creation screen when you access it from the Web App:
 |
| Time |
The Time data type allows you to select a valid time from the time picker.
Use a time field if you want the users to enter a specific time. The below
image shows how a Time field appears on the work creation screen when you
access it from the Web App:
 |
| URL |
The URL data type allows you to enter a URL - the link to a website or web
page. The below image shows how a URL field appears on the work creation
screen when you access it from the Web App:
 |
| Video |
The Video data type allows you to record or upload a video while creating
work. From the Web App, you can only upload a video file. The below image
shows how a Video field appears on the work creation screen when you access
it from the Web App:
 |
| Yes/No |
The Yes/No data type allows you to select a yes/no response. You can set the
default value and make it read-only. The below image shows how a Yes/No
field appears on the work creation screen when you access it from the Web
App:
 |