
Schedule Work Notifications
To schedule work notifications, follow the steps below.
-
Go to .

Note: If the Notifications module is missing from the navigation menu, it may not be enabled for the web app. Contact your administrator for assistance. -
In the Notifications page, click the + Add
Notification button located on the top right corner.

-
Change Rule Type to Event.

-
Enter a title for the notification in the Name
textbox.

-
Select Notify When as Work.
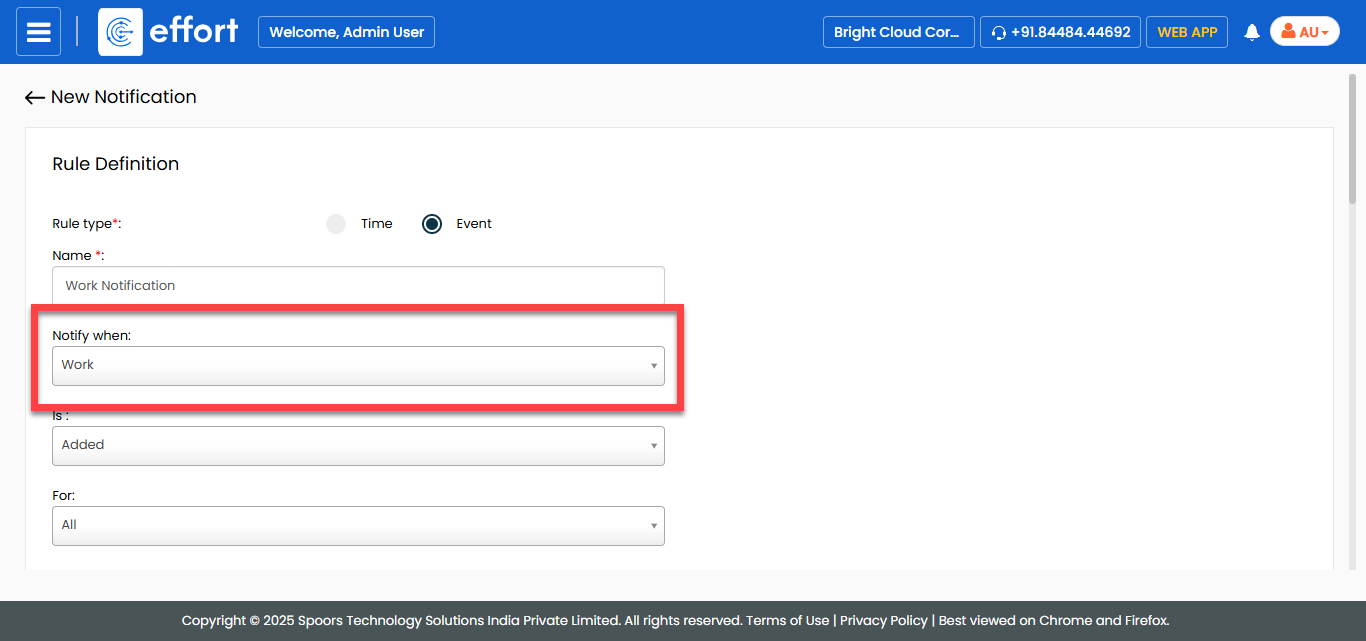
-
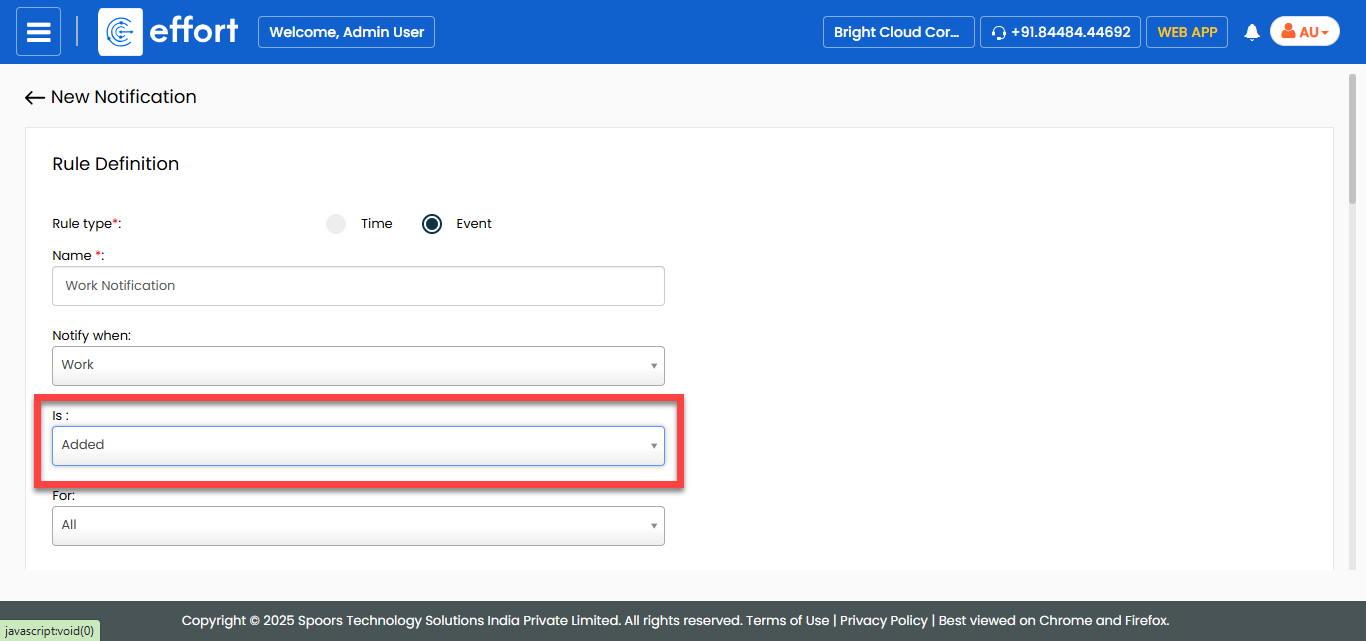
From the Is dropdown, select an event to send
notifications.
- Optional:
If you want to schedule notification for a specific process, select the desired
process from the For dropdown.

Note: If you want to schedule notifications for all work processes, you can ignore this step. -
In the Delivery Rule section, do the following:
-
Select the notification delivery options as per your requirement.

- Email: Allows you to send notification via Email.
- SMS: Allows you to send notification via SMS.
- Sync & Web-Notifications: Allows you to send web notifications.
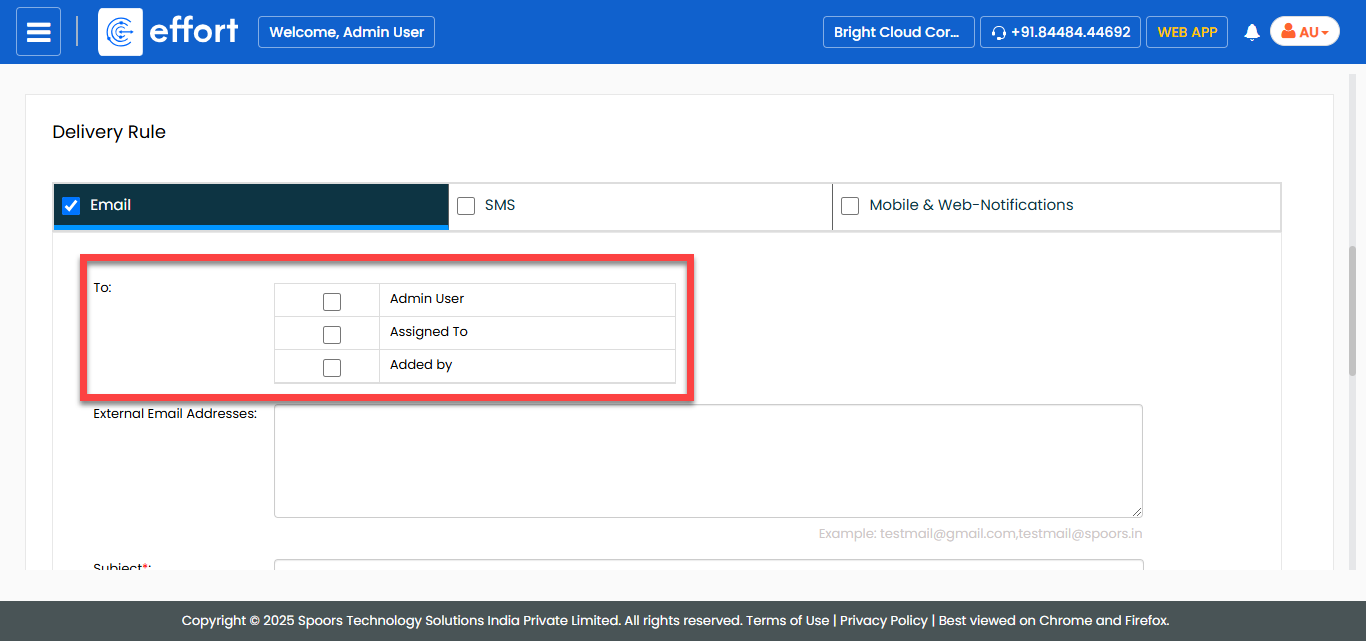
-
For the To field, select the employees to whom
you want to trigger the notification.
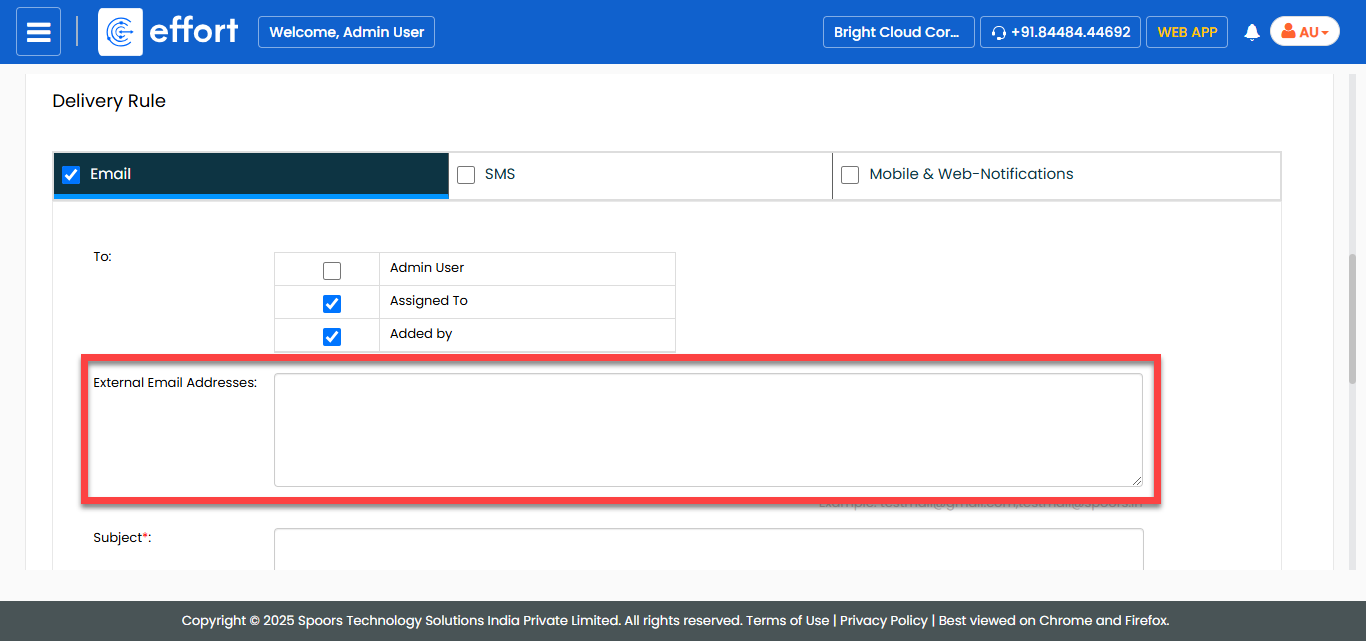
-
In the External Email Addresses field, enter the
email addresses to which you want to trigger email.
-
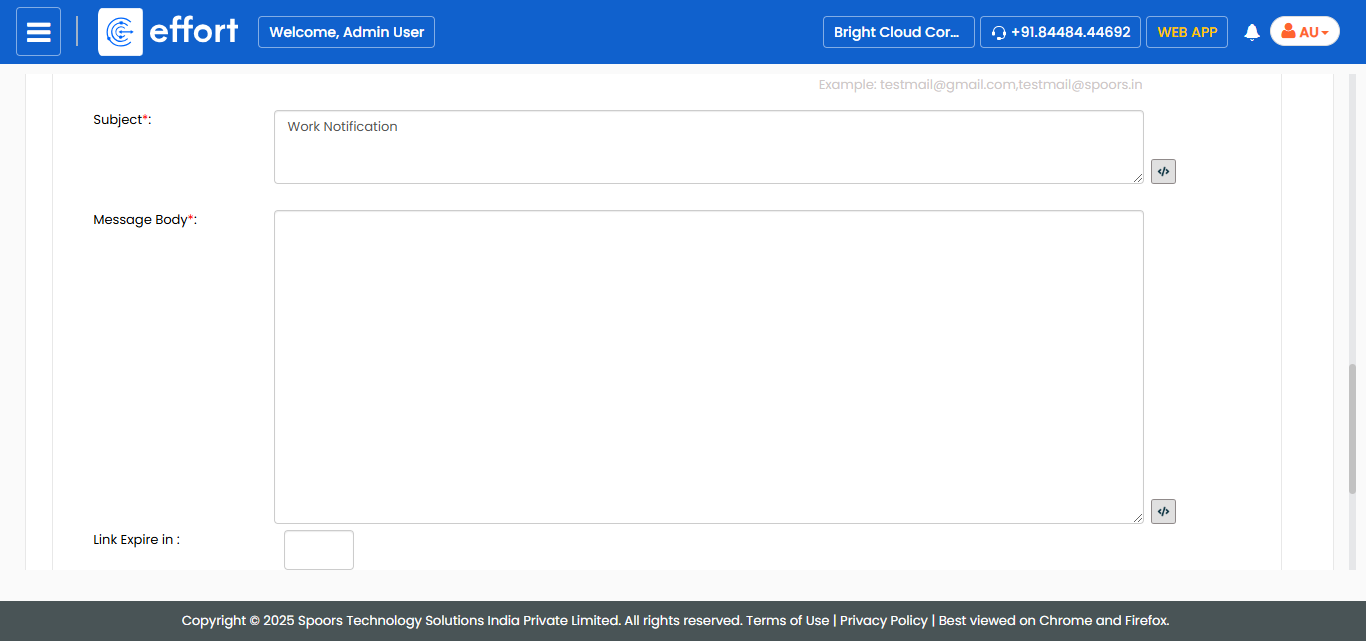
In the Subject field, enter the subject line for
the notification.

Click the pick fields icon to add fields such as employee name,
employee, and last sync time in the subject line.
to add fields such as employee name,
employee, and last sync time in the subject line. -
In the Message Body field, enter the
notification content.
-
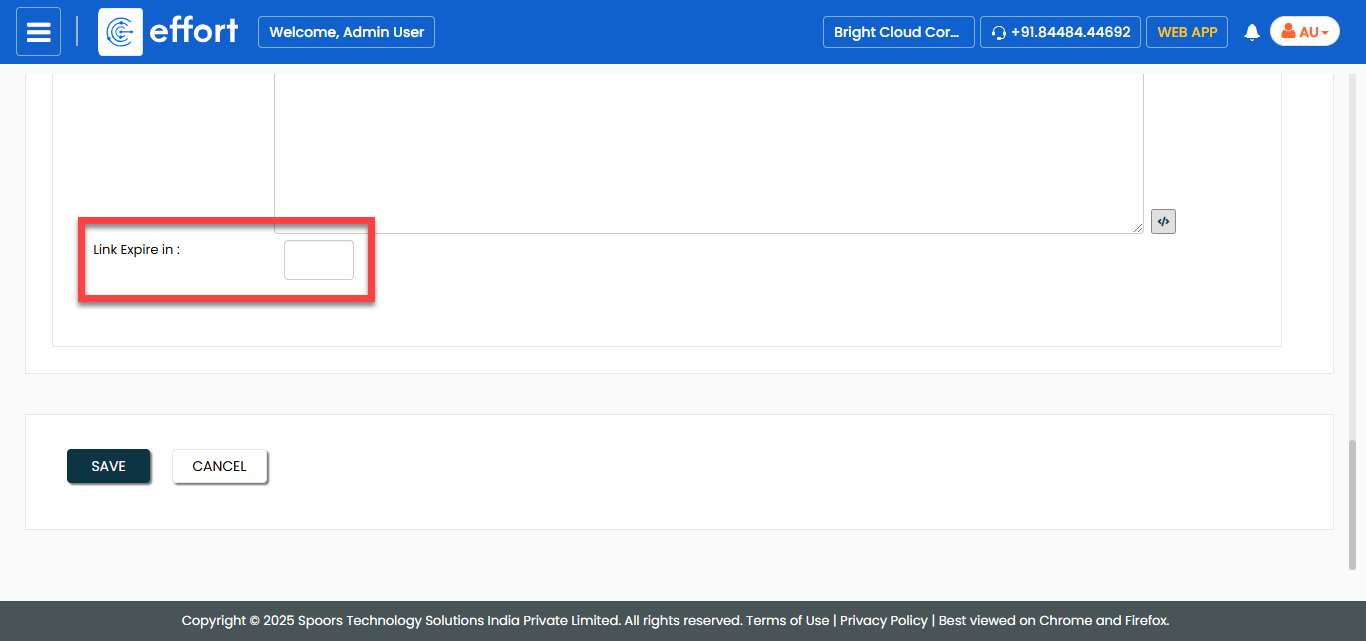
In the Link Expire in field, set the duration
for link expire if the message body contains any links.
-
Select the notification delivery options as per your requirement.
- Click Save.