
Trigger Work
To trigger a work, follow the steps below:
-
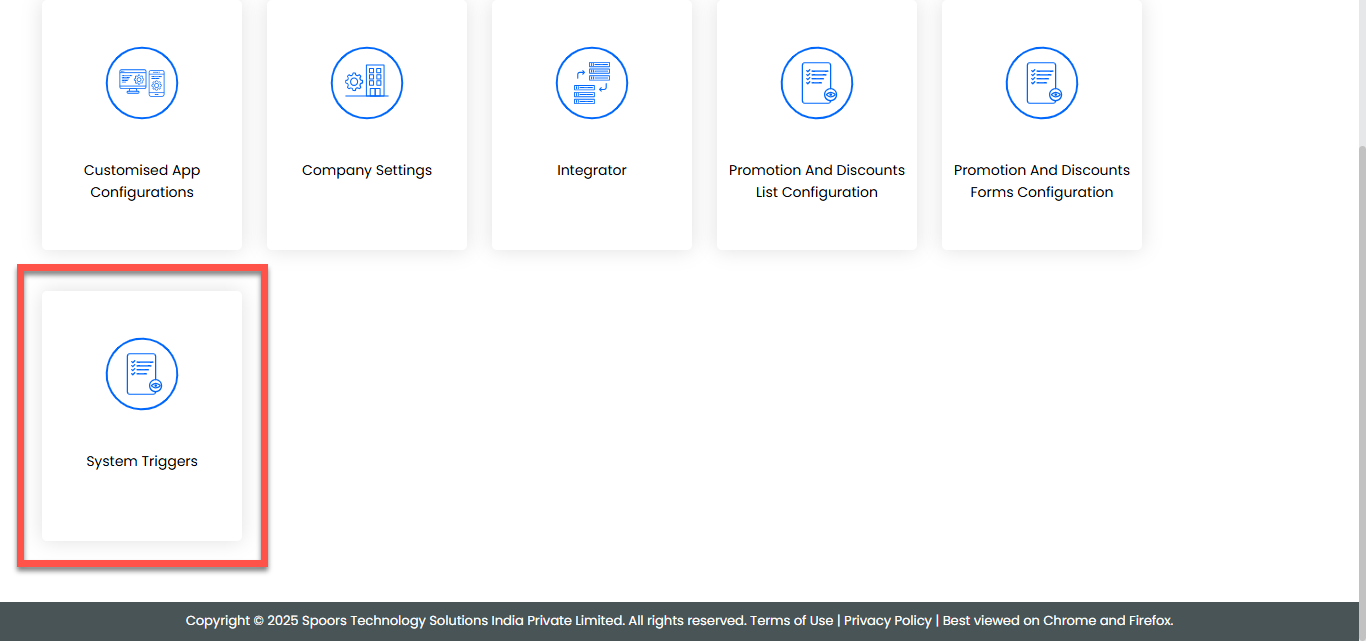
Navigate to .
-
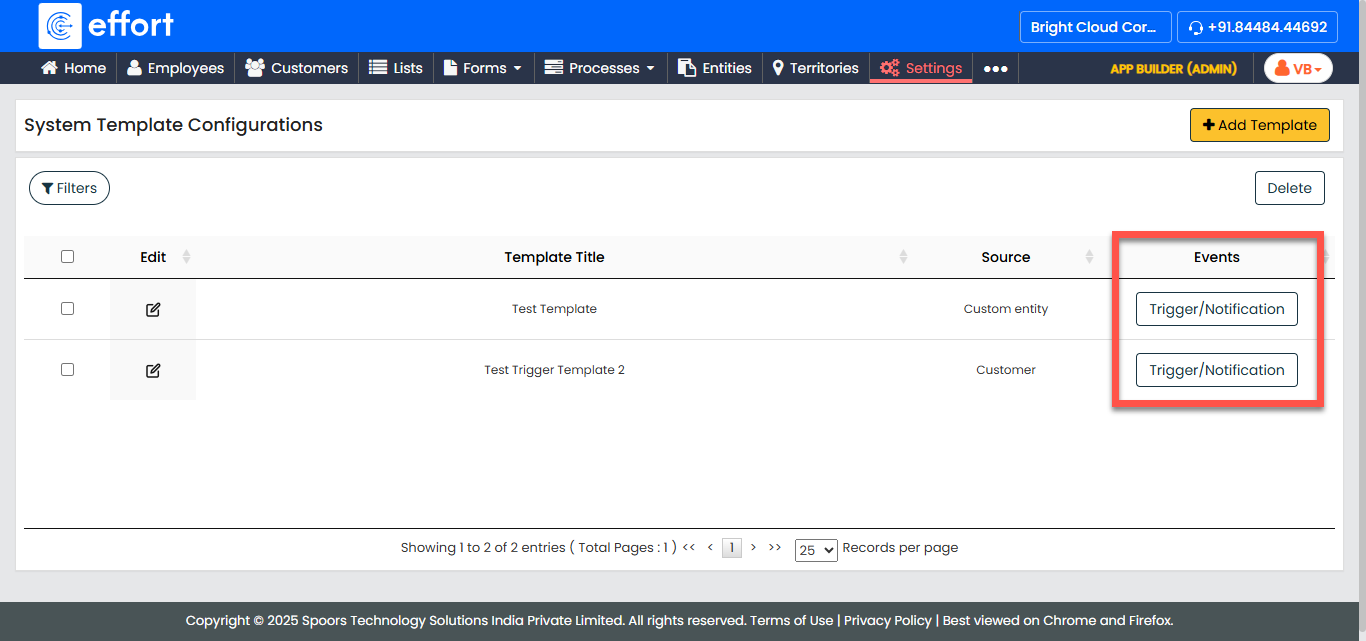
On the System Template Configurations page, click the Trigger/Notification button for the template you want to configure, located under the Events column.
-
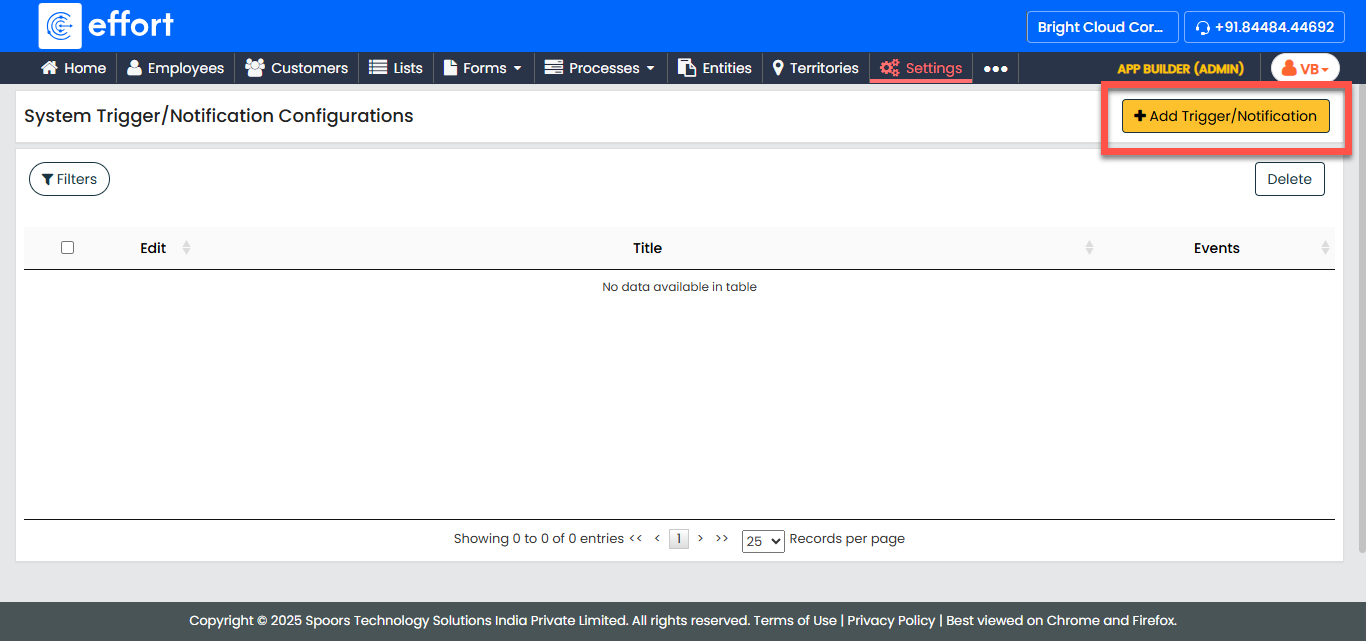
In the System Trigger/Notification Configurations page, click + Add Trigger/Notification.
-
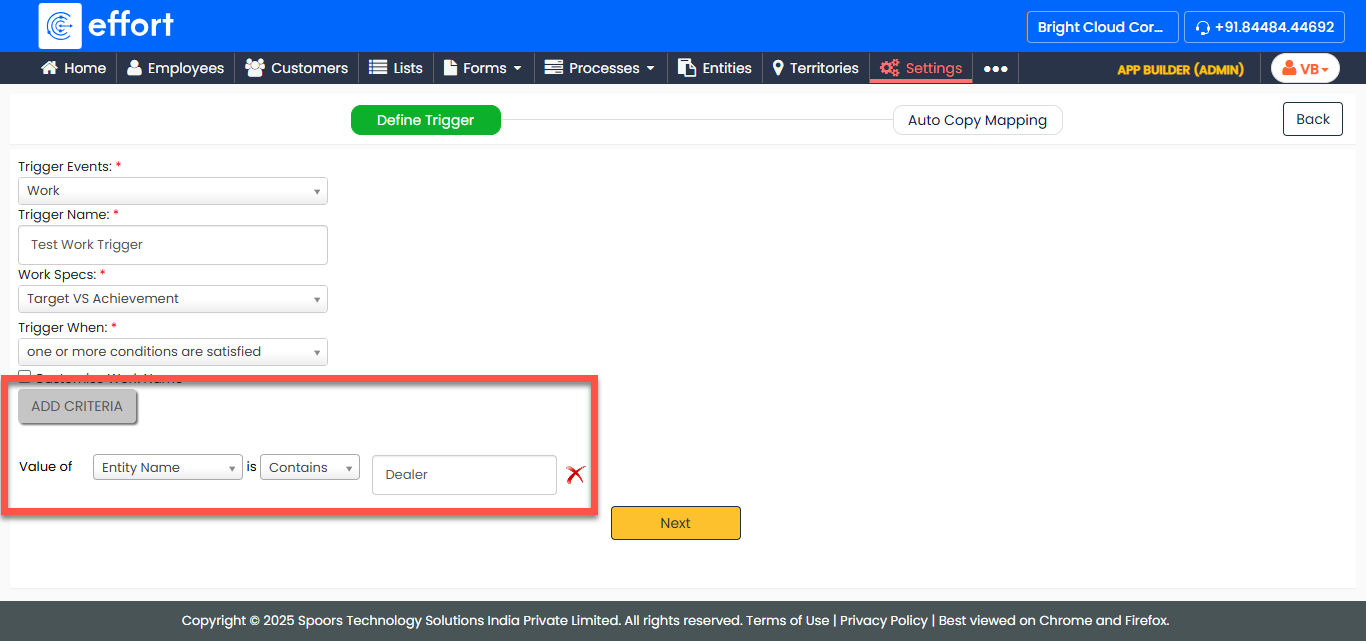
In the Define Trigger section, provide the following details:
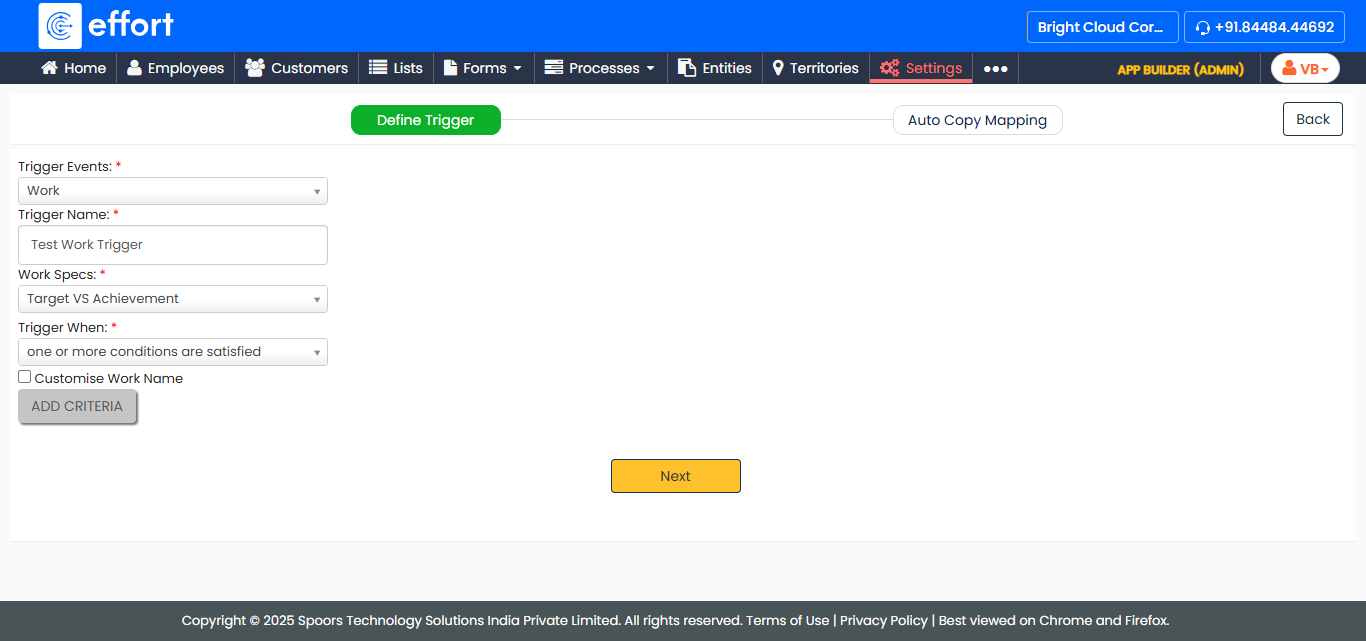
Field Description Trigger Events
Ensure Works is selected as the trigger event. Trigger Name
Enter a name for the trigger. Work Specs
Select the specific work you want to trigger. Trigger When
Select a condition for triggering the work: - All conditions are satisfied
- One or more conditions are satisfied
Customise Work Name
If you want to customize the work name, select this checkbox. -
After providing the required details, click Add Criteria to define the conditions for the trigger.
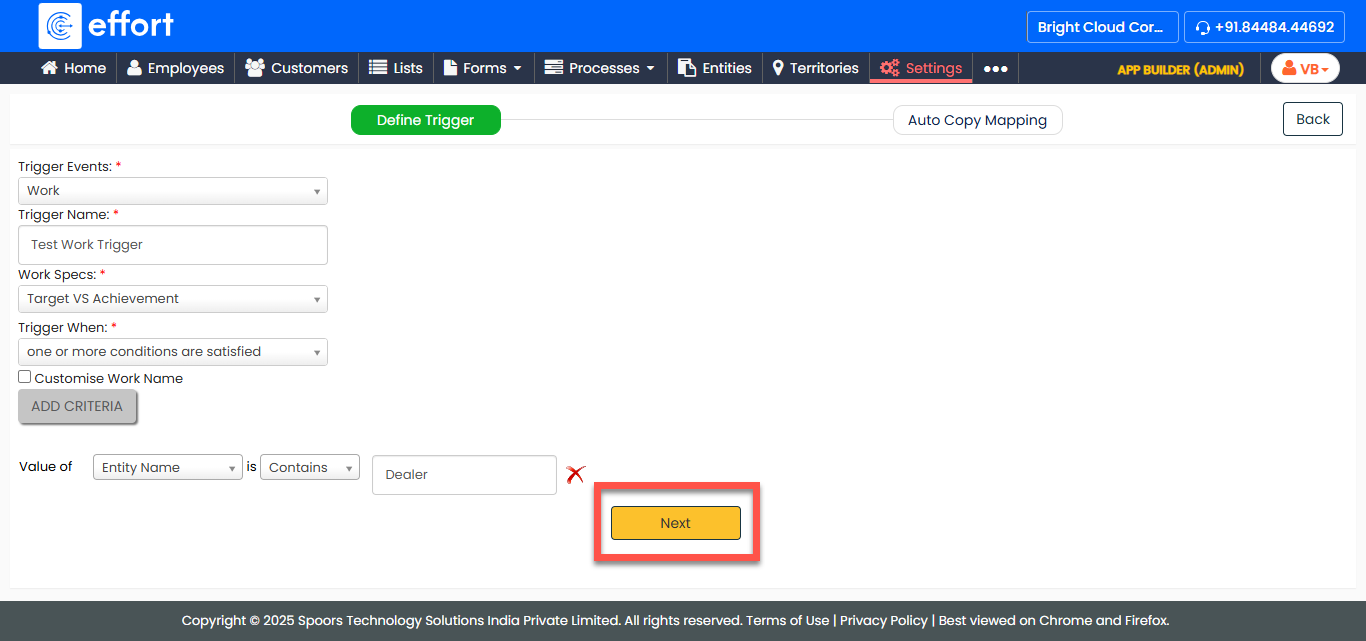
-
Once the conditions are defined, click Next to
proceed.
-
Under the Custom Entity/Customer Fields column, map the relevant entity/customer fields to their corresponding work fields.
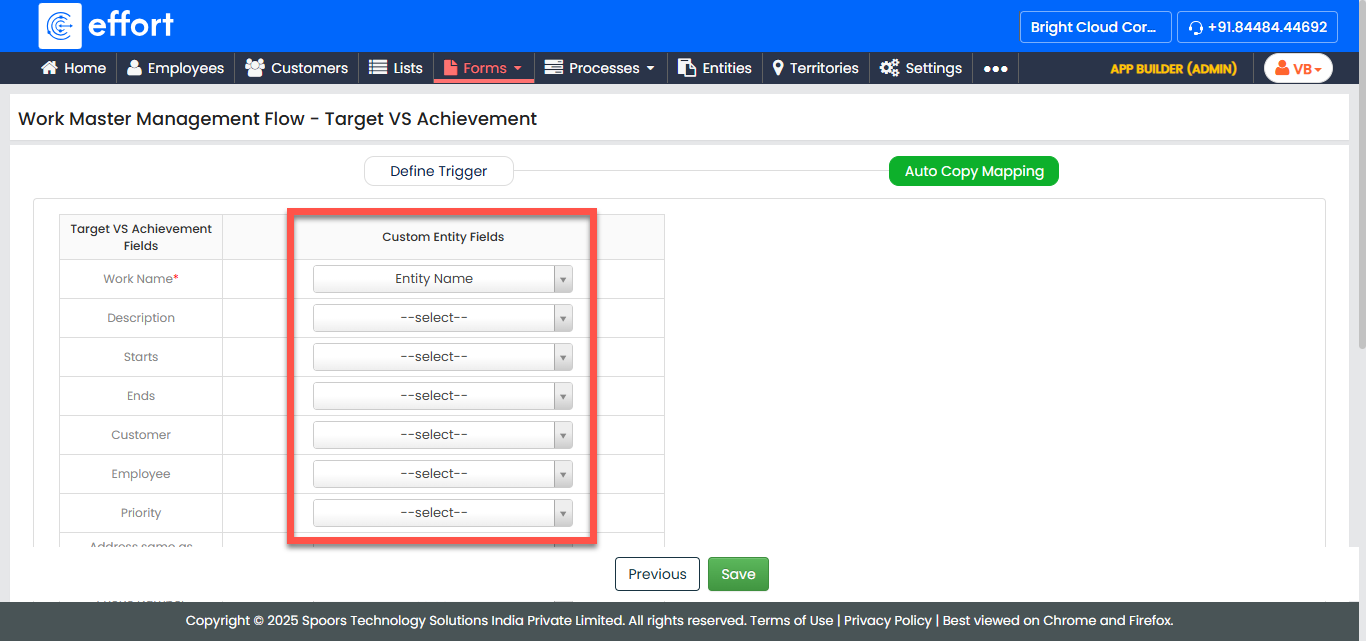
Note:In the screenshot, the entity name is mapped to the work name. If an entity is created, a work will be generated with the entity name as the work name.
If the template is set up for a customer, the Customer Fields will appear instead of Custom Entity Fields.
- After defining the field mappings, click Save to save your trigger configuration.