
Automate Form Submission Using OCR
Do you want to transform your physical documents into digital content? Are you looking to automate the form submission by eliminating the manual data entry? Do you have a scenario where your users need to manually enter the data in the documents like invoices, business cards, etc.? We have an option that reduces manual data entry and automates the form submission.
The Effort platform has been equipped with OCR (Optical Character Recognition) technology that helps you get the correct data from the correct documents faster. Using OCR technology, you can automate a form submission by extracting the data from the images or documents and populating it onto the form fields. In the mobile app, you need to just scan an object, then the text in the object will be populated onto the form fields. In the web app, you need to upload an image, then the text in the uploaded image is pulled onto the form fields.

Let's say you need to capture details on the receipts like this onto the form. If you do it manually, there are chances of having errors and take more time to enter the data. OCR can help in automating the data entry processes. Instead of manually typing the data, you can use OCR to read data from images or documents and populate them onto the form fields. It helps you achieve higher productivity, cost reduction, and high accuracy. This tutorial walks you through the various steps to enable the OCR functionality and know how it works.
Create a Sample Form
In this section, we will create a sample form and enable the OCR feature. The setup is very simple and easy to configure.
- As a first step, create a form. Check out the Create a Form page to know how to create a form.
-
Add text fields on the canvas and label them as shown below.

If you observe the labels, we have given similar to the labels which we have seen in the GHMC receipt sample. When you scan a receipt, the data against the same label will be populated onto the field. We need to create a form in the format of the receipt which you need to scan. - Enable publishing and Save the form.
-
Now you will see the Form Actions page. Here, click on the Configure
Save Options card.

-
Enable the checkbox against the last option as shown below and Save the
configuration.

This is the setting you need to enable for using the OCR facility. If you enable this, you will get the text on an image or document onto the form fields. In the next section, we will check how this configuration work.
Check How OCR Works
In this section, we will submit the form and check how the OCR is working.
- Open the Effort Plus mobile app on your mobile.
-
Tap on the Forms tab to go to the Form page.

The forms page appears with all the available forms.
-
Tap on the GHMC Receipt Scanning form.

-
Tap the OCR icon located at the top of the page.

-
You will be redirected to the Camera app. Place the camera properly and tap
the shutter button to take a photo of the receipt.

-
You can see the image preview. Tap on the tick mark to continue.
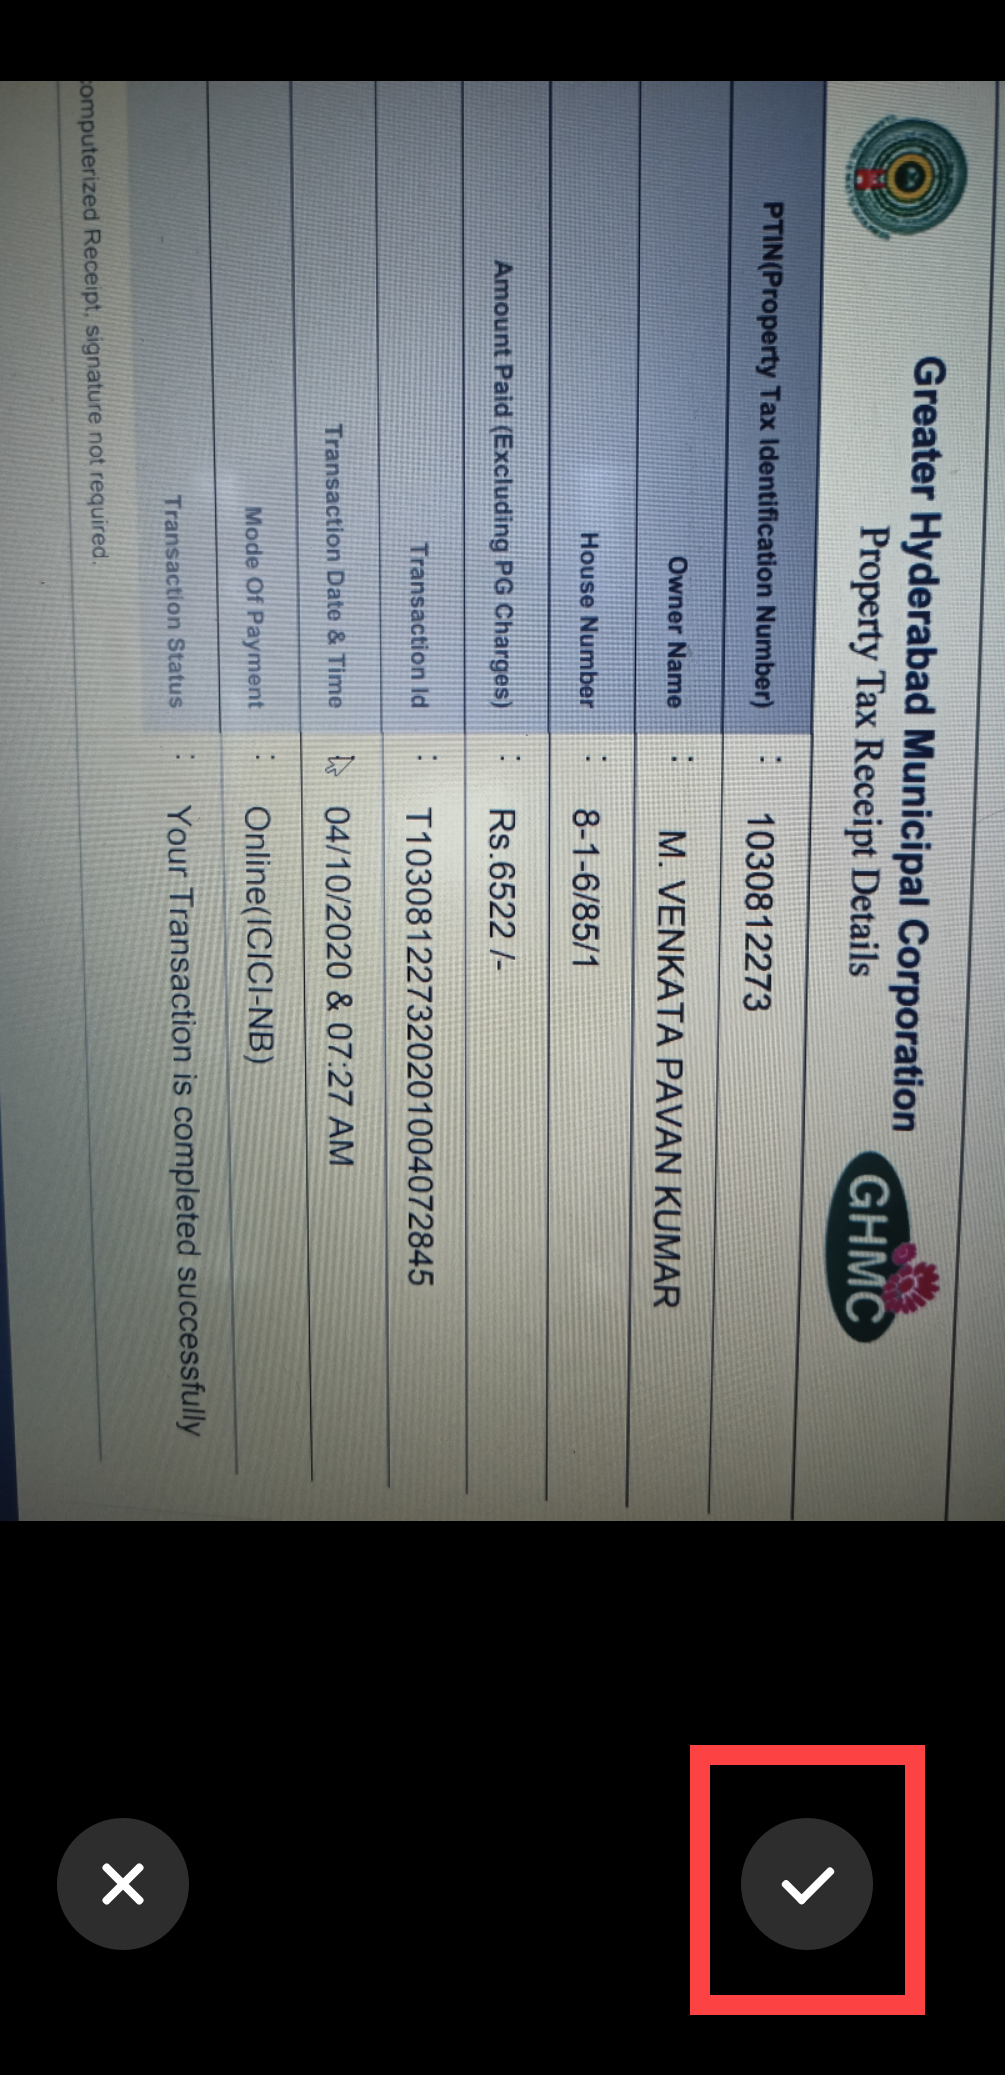
-
Once you tap the tick mark, the image gets processed, and the text on the
receipt will be populated onto the form fields.

Look at the above image to see how the text was populated onto the form fields. This is how the OCR feature works. This way, you can automate the form submission, eliminate manual data entry, and achieve higher productivity.