
Create a Mobile App for Customers
To create a mobile app for your customers, follow the steps below:
-
Go to .

-
On the Start tab, provide the following details and
click Next.

Field Description App Name Enter a name for your customer's app. Banner Image Url Enter the image URL for the banner in the mobile app. Note: Do not use &'s in the URL.App Icon Image Url Enter the image URL for the mobile app icon. Note: Do not use &'s in the URL.Login Screen Information Enter the text to be displayed on the login screen. Login Screen Information Image Url Enter the URL of the image to be displayed for the login screen information. -
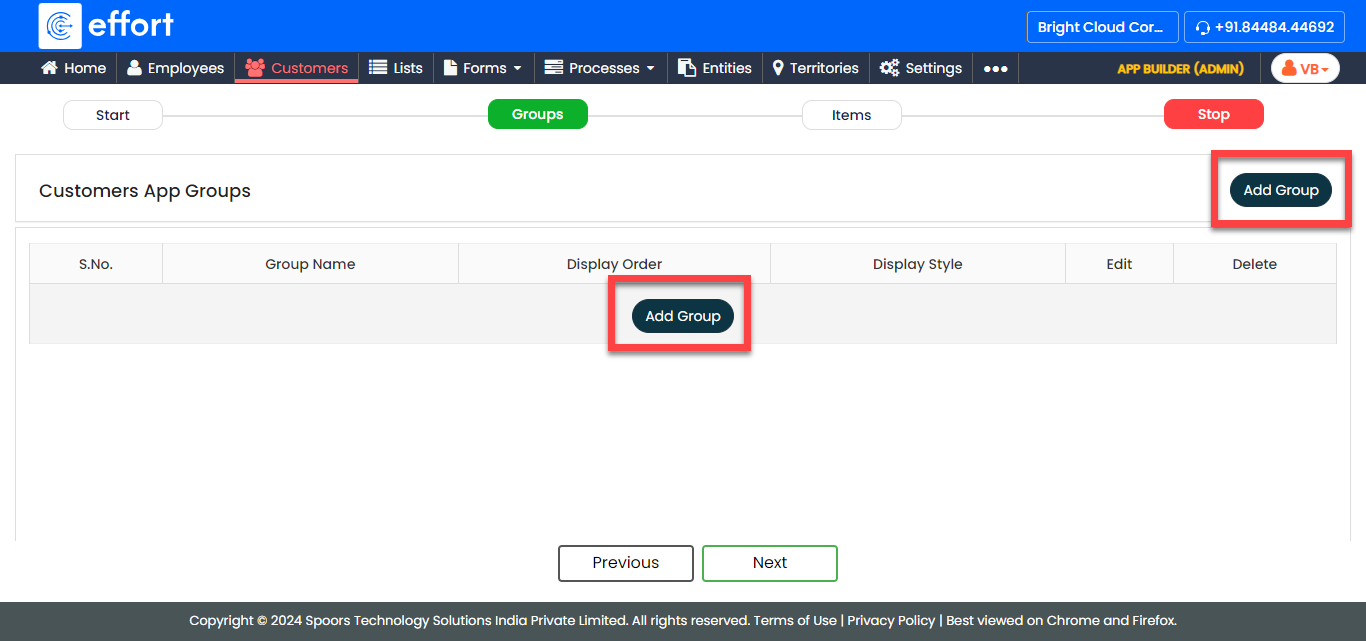
On the Groups tab, do the following and click
Next.
-
Click Add Group.
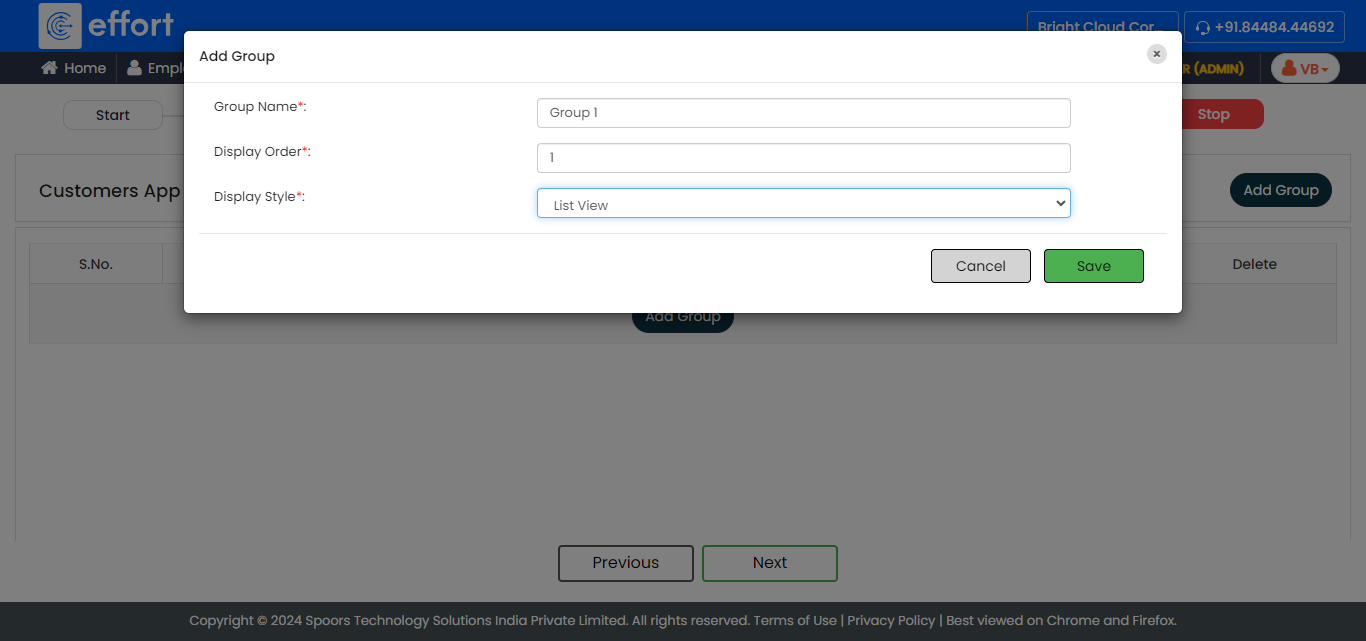
-
On the Add Group pop-up window, provide the
following details and click Save.
- Group Name: Enter a name for the group. This name will be used to categorize items in the mobile app.
- Display Order: Specify the display order of the group.
- Display Style: Choose how you want to display the items in this group.
- Optional:
If you want to add more groups, click the Add
Group button again and define the fields according to
your requirements.
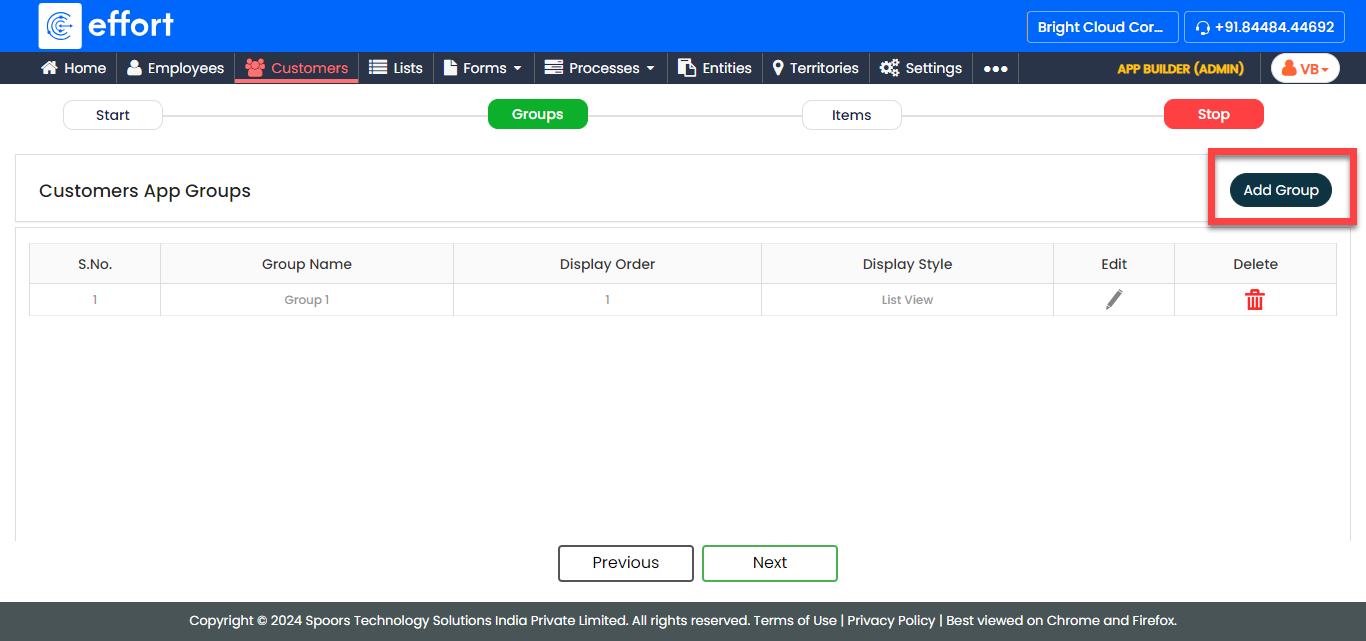
-
Click Add Group.
-
On the Items tab, do the following and click
Next.
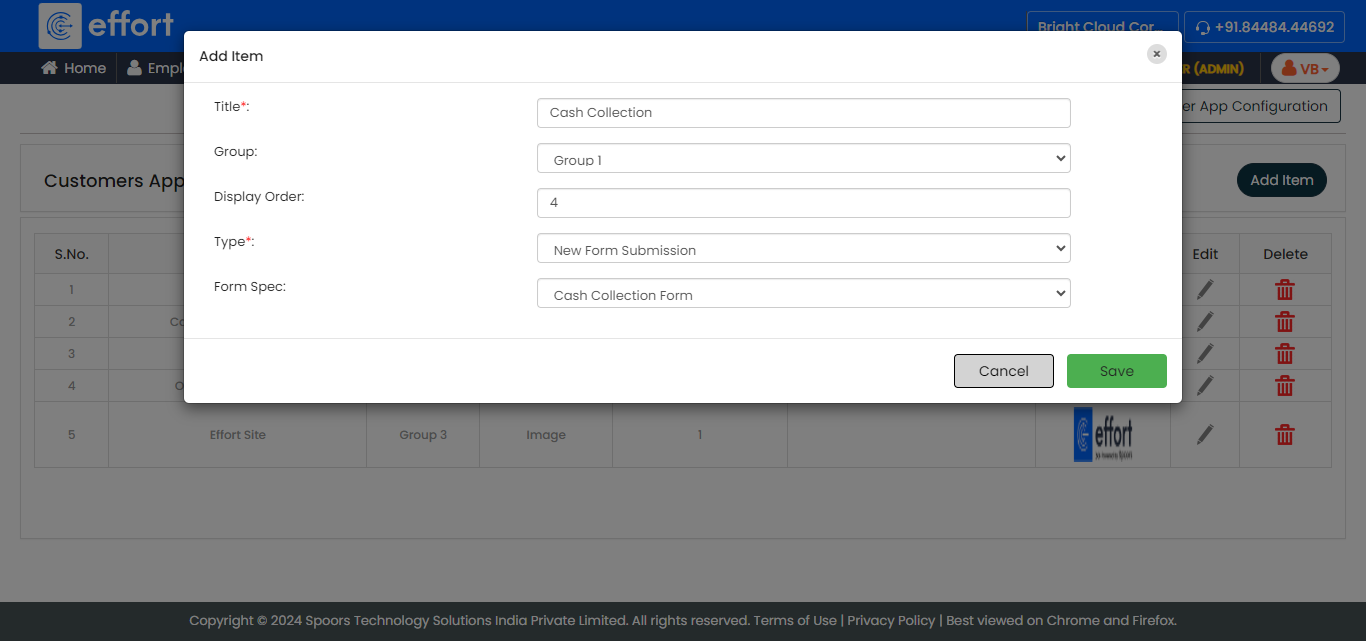
-
Click Add Item.

-
On the Add Item pop-up window, provide the
following details and click Save.
- Title: Enter a title for the item/activity.
- Group: Choose the group to which you want to add this item/activity.
- Display Order: Specify the order in which the item/activity should appear within the group.
- Type: Select the item type from the
dropdown. After you select Type, you must
provide inputs to the following fields.
- Form Spec: This field is displayed when you choose either New Form Submission or Form Submission List View as the type. Select the form template you wish to make available for customers to view and submit requests.
- Work Spec: This field is displayed when you choose either New Work Submission or Work Submission List View as the type. Select the work template you wish to make available for customers to view and submit works.
- List Spec: This field is displayed when you choose Items as the type. Select the list template you wish to make available for customers to view the items in it.
- Web Page: This field is displayed when you choose Web Page as the type. Provide the web page URL.
- Thumbnail Path: This field is displayed when you choose Web Page as the type. Provide the thumbnail image URL path.
- Description: This field is displayed when you choose Web Page as the type. Enter the additional information to be displayed to the customer.
- CustomEntity Spec: This field is displayed when you choose Custom Entity as the type. Select the entity you wish to make available for customers to view it's items.
-
Click Add Item.