
Manage Referenced Lists
Pre-Requisites
Before you define this configuration:
-
Ensure you have already created customers in the Web App.
Ensure you have already created list masters with the Customer data type and added items to them. Only list masters with the Customer data type are available to enable on the customer details screen.
- If you want to manage a list master, ensure to enable the Lists module from the Settings module. To enable this, go to .
To define manage reference lists configuration, follow the steps below:
- Go to .
-
Scroll down to the Utilities section, and click the
Manage Referenced Masters card.

-
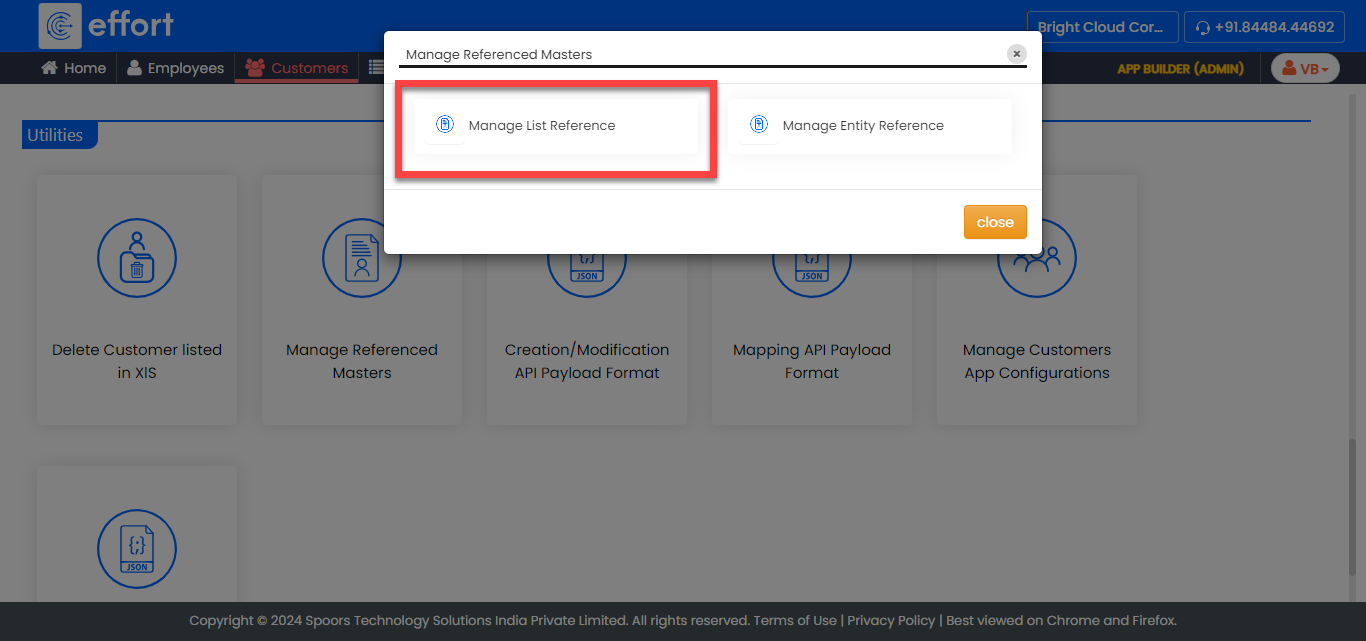
On the Manage Referenced Masters pop-up window, click
Manage List Reference.
-
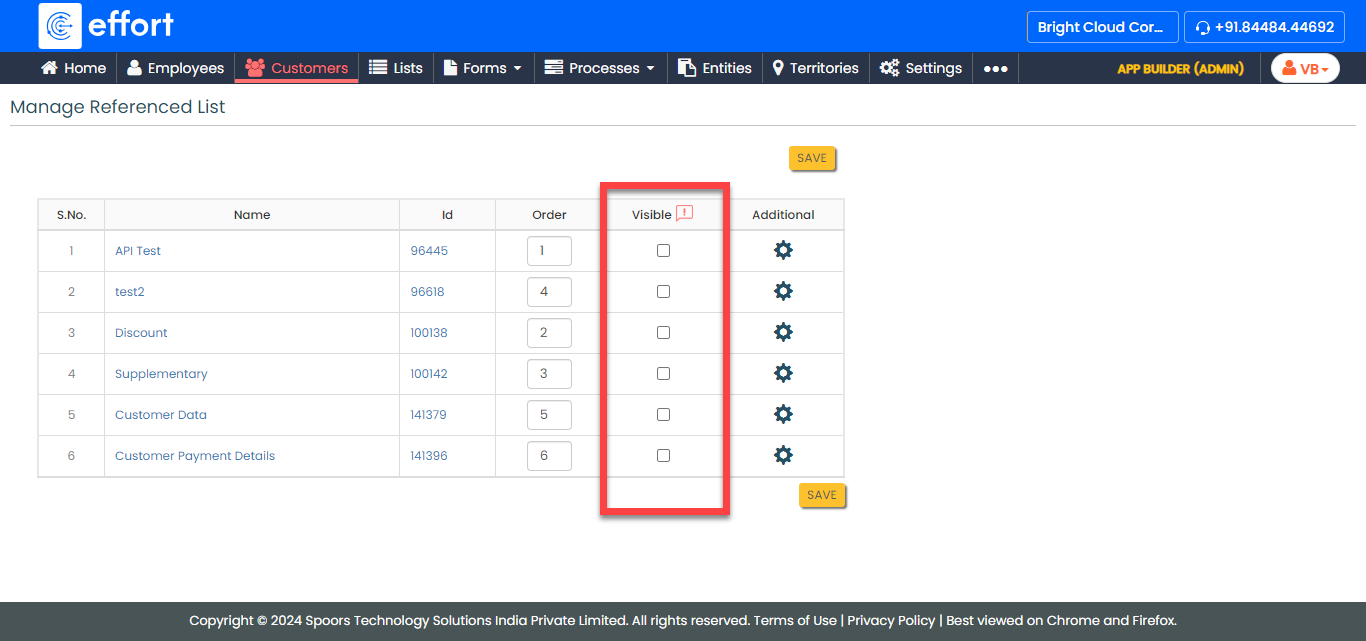
On the Manage Referenced List page, do the
following:
-
Under the Visible column, select the checkbox
against the list master that you want to make available on the customer
details screen.
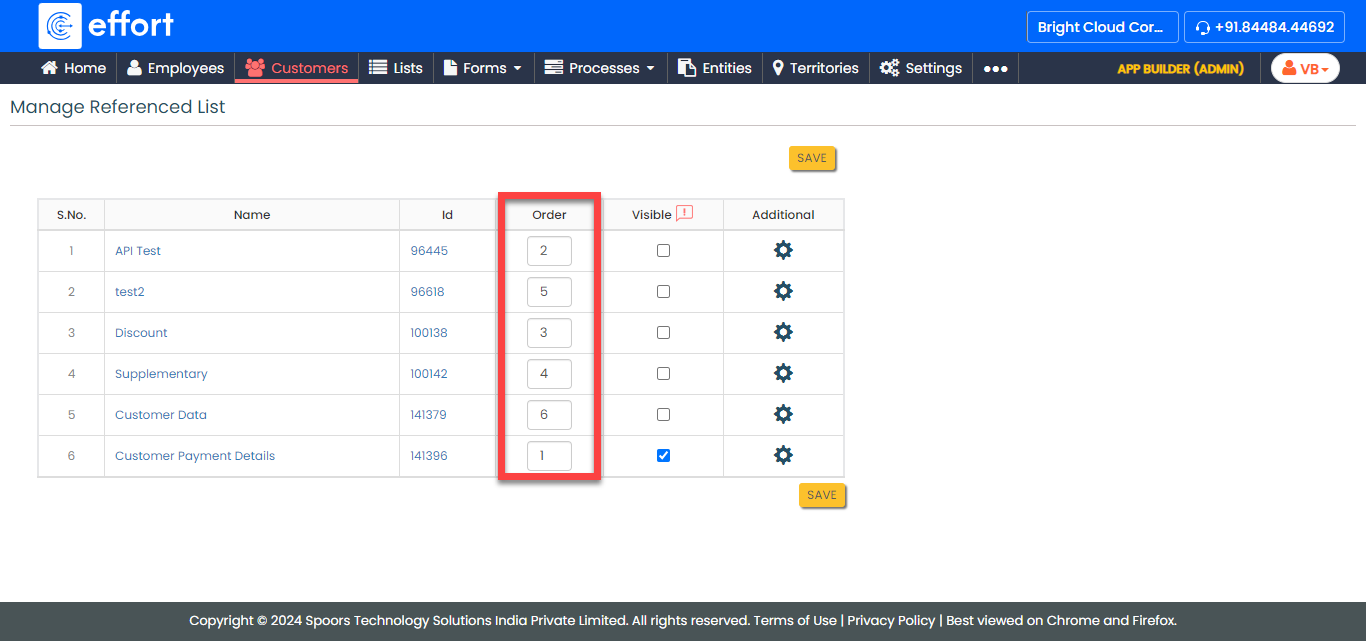
-
Under the Order column, define the order of the
visibility.
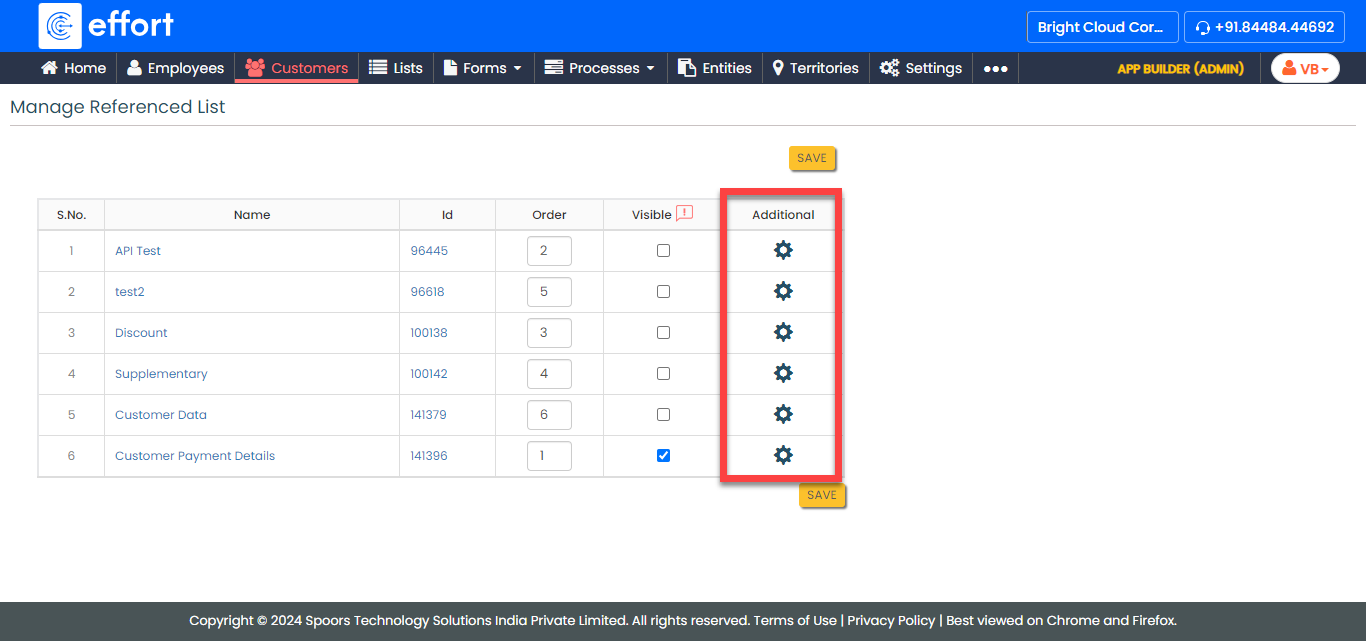
- Optional:
Under the Additional column, click the gear icon
to configure settings for the customer status/expiry visibility. Refer
to the Advanced Settings - Manage Referenced Masters
topic to know more about all the settings.
-
Under the Visible column, select the checkbox
against the list master that you want to make available on the customer
details screen.
- Click Save.