
Configure Data Provider Bot Activity
To configure data provider bot activity, follow the steps below.
-
Go to .
The Activity Process page appears.
-
Click on a <Work Process> card which has Data
Provider Bot activities.

The <Work Process> activities page appears.
-
Click the Manage Flow card under the Work
Process Essentials section.

The Manage Work flow for <Work Process> page appears.
-
Click the gear
 icon
under the Configure Bot / External Activity column.
icon
under the Configure Bot / External Activity column.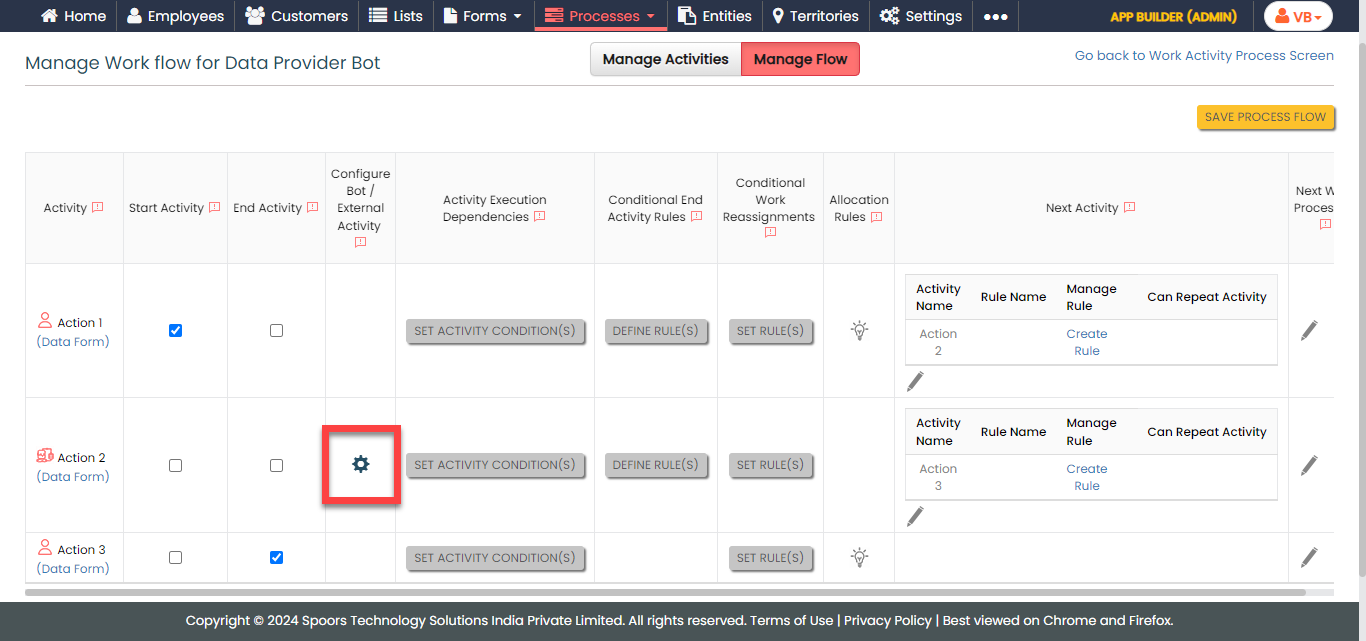
-
Configure the API Service URL.

-
Enter the API endpoint URL in the URL
textbox.

- Optional:
Click Get the Custom Response check box to
customize the information sent in responses.
- Optional:
If you opted for Basic AUTH or
JWT in the
Authentication, then enter User
Name and Password.
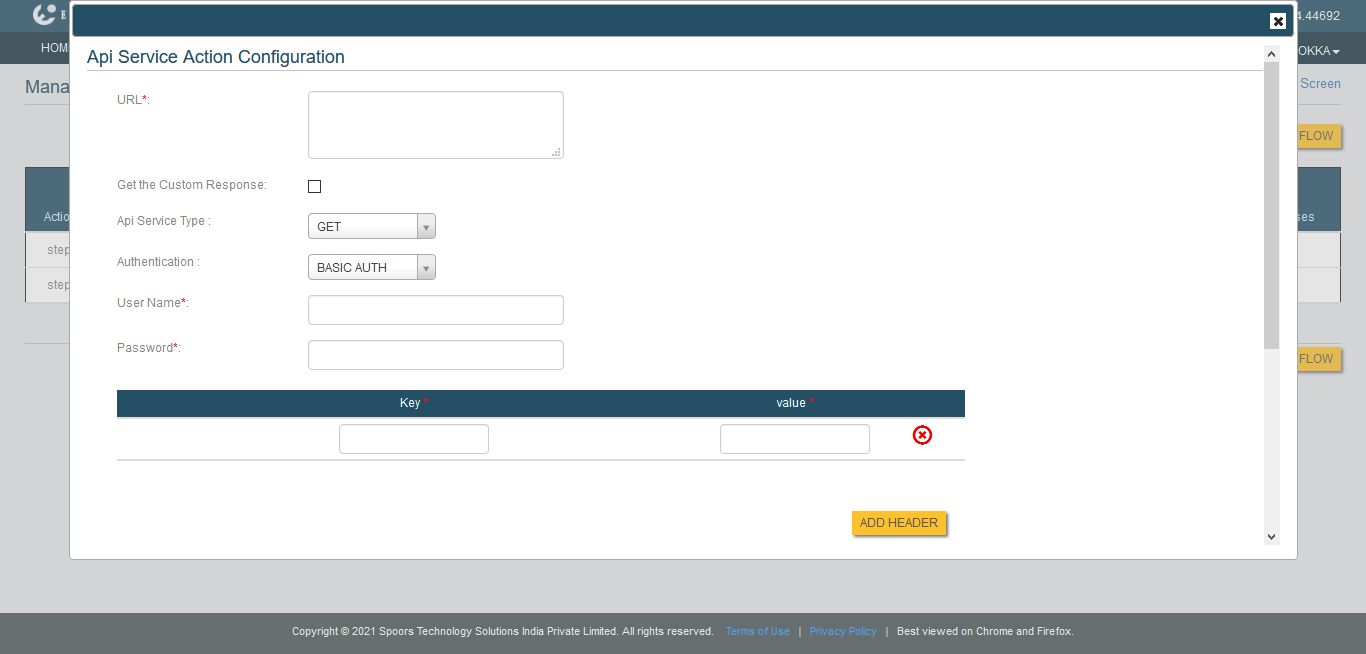
This step is not required if you opted for NO AUTH in the Authentication.
-
Enter the API endpoint URL in the URL
textbox.
-
Add Headers, if necessary.
-
Click the Add Headers button.
-
Enter the header key in the textbox provided under the
Key column.
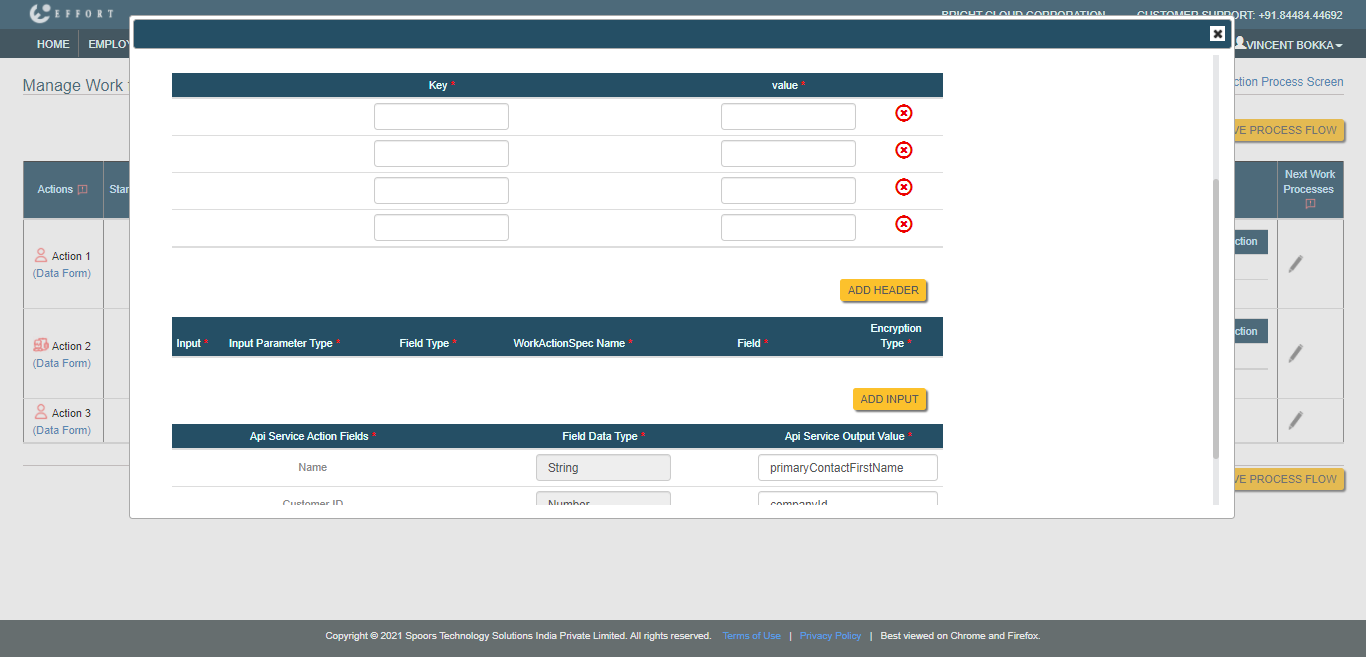
- Enter the header key value in the textbox provided under the value column.
-
Click the Add Headers button.
-
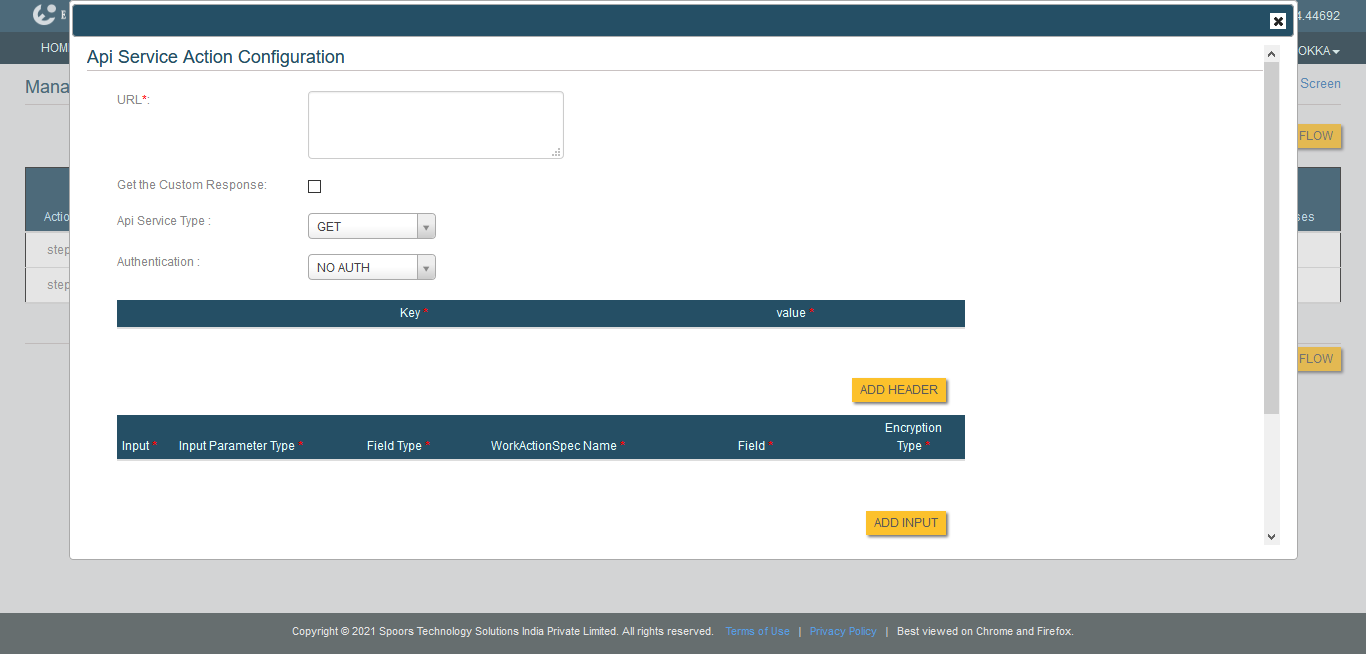
Add Inputs.
-
Click Add Inputs button.

-
Enter the values in the below mandatory fields.
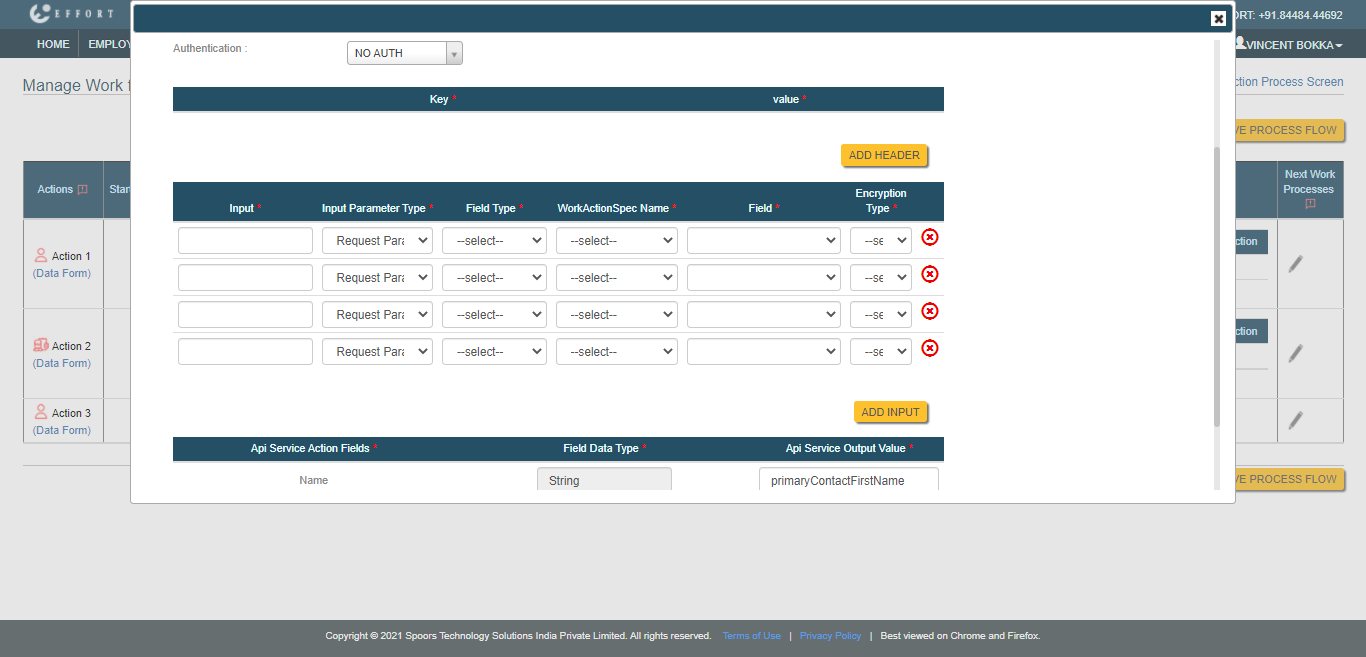
- Input: Enter an input parameter.
- Input Parameter Type: Select a parameter type such as Request Param, Path Variable, and Request Body from this dropdown.
- Field Type: Select a field type such as Work or Work Activity from this dropdown.
- WorkActionSpec Name: Select a work activity from which you want to configure the input.
- Field: In this dropdown, select a field from which input is considered.
- Encryption Type
-
Click Add Inputs button.
-
Configure a response parameter to the form fields associated with the work
activity in the textbox provided under the API Service Output
Value column.
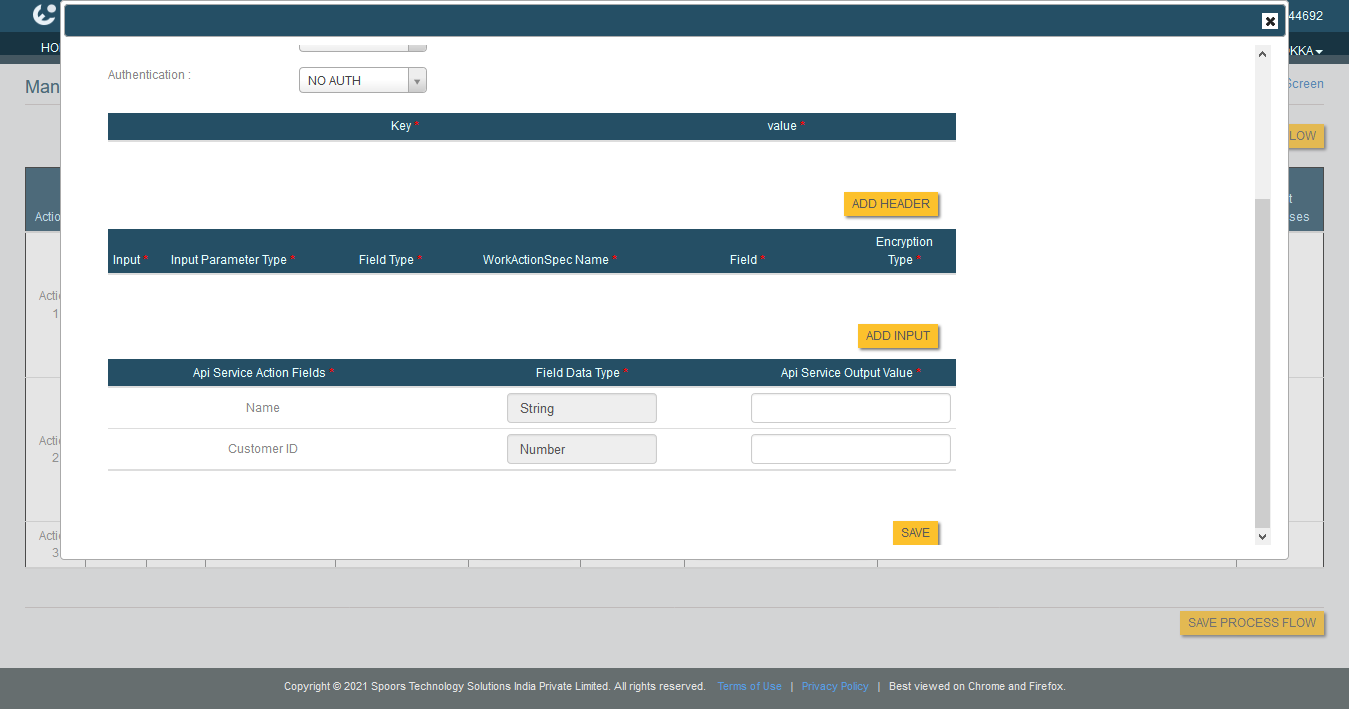
- Click Save.