
Create a Checklist Process
To create a checklist process, follow the steps below.
-
Go to .
The Processes page appears.
-
Click the Create Process button.

The Add a New Checklist Process Template pop-up appears.
-
Click the Create On My Own link.

- Enter the necessary inputs in the below configuration screens to create the work process and click the Next button to move to the next configuration screen.
-
Start - Configuration: Define work process name and
description.
-
Enter a name for the work process in the Work Process
Name field.

-
If needed, enter the process description in the Work
Description field.

-
Enter a name for the work process in the Work Process
Name field.
-
Manage Work Fields - Configuration: Define the work
fields configuration like order, label, mandatoriness, visibility, etc. The
configured fields can be used to create work in the web app.
-
Configure the work fields depending on your requirement.

Refer to the below topics to know more about the work fields, configuration columns, and advanced settings.
-
Configure the work fields depending on your requirement.
-
Manage Forms - Configuration: This screen allows you to
create a new form and provide visibility of available forms.
-
Click Create A New Form to create a form new
form.
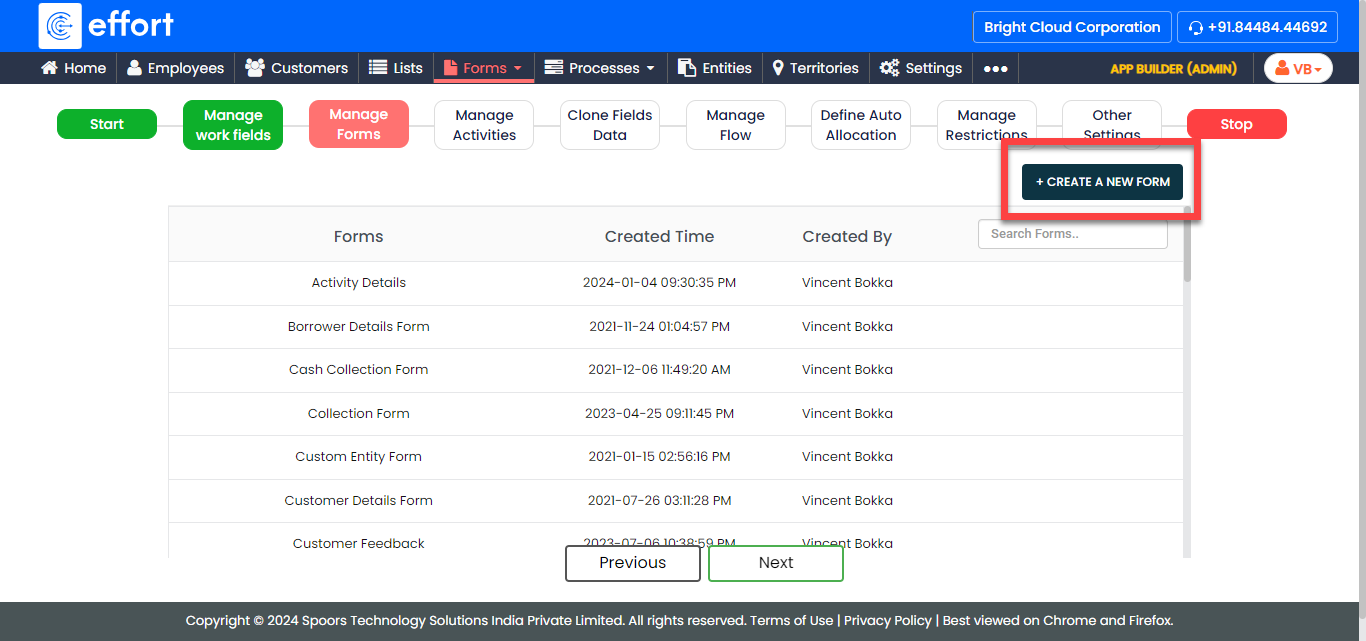
Refer to the Create a Form for the steps required to create a form.
-
Click Create A New Form to create a form new
form.
-
Manage Activities - Configuration
-
Click Add Activity button and enter the details
to add an activity for the work process.

Click on Add Activity again to add more activities. Refer to the Activities: Fields and Description topic to know more about the configuration columns. - Optional:
Click Add Attachments button and configure a
form that should be submitted along with the parent work process.

Click on Add Attachments again to add more forms.
-
Click Add Activity button and enter the details
to add an activity for the work process.
-
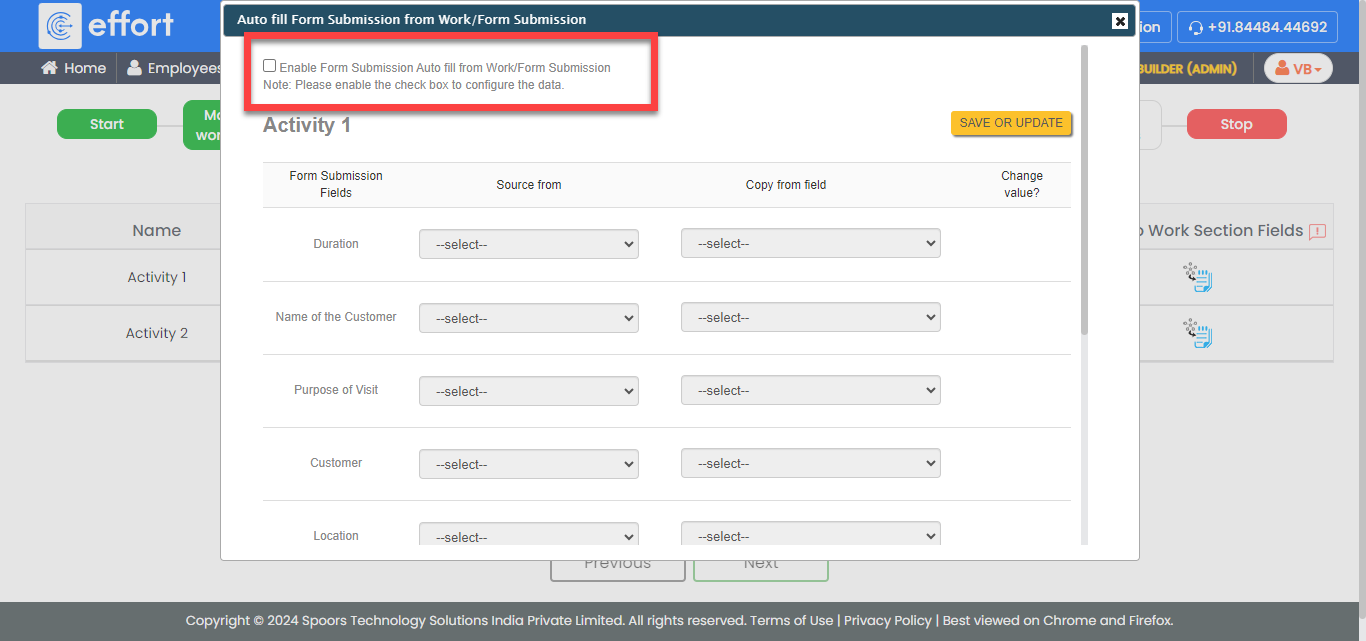
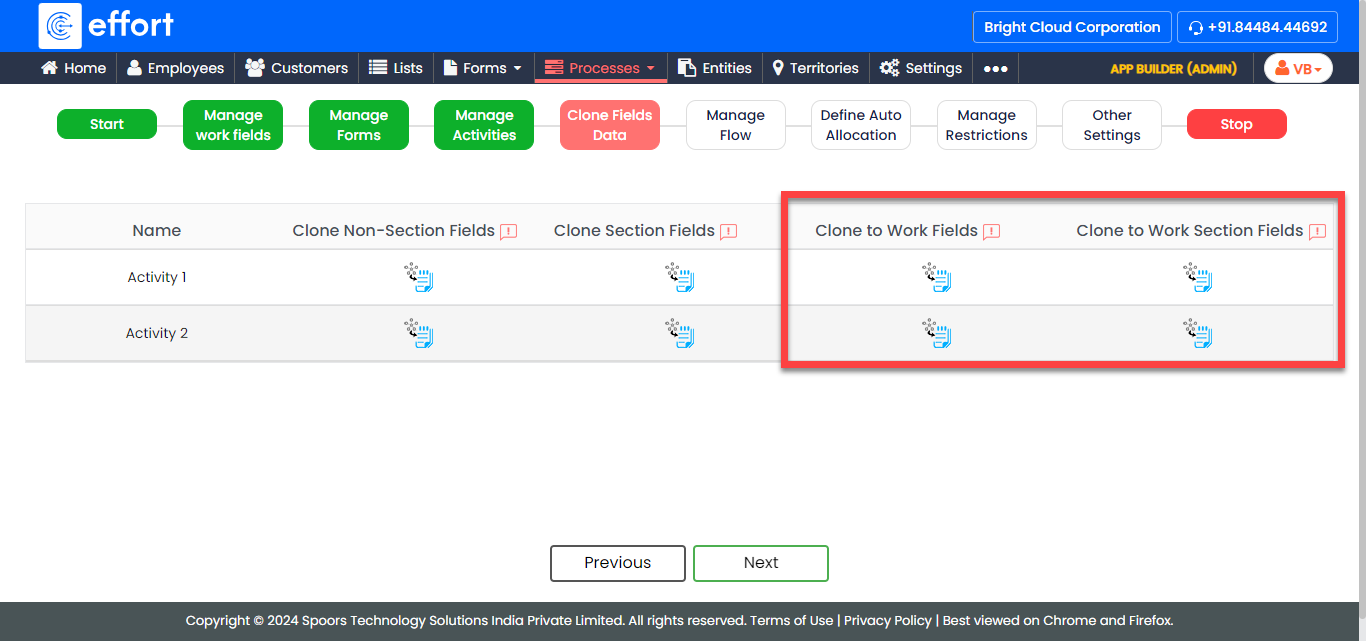
Clone Fields Data - Configuration
-
Click Auto Form Fill icon
 given
under the Clone Non-Section Fields column against
the required work activity to configure auto copy from work section
fields to activity form fields.
given
under the Clone Non-Section Fields column against
the required work activity to configure auto copy from work section
fields to activity form fields.
-
Click the Enable Form Submission Auto fill from Work/Form
Submission to define the autofill configuration.
-
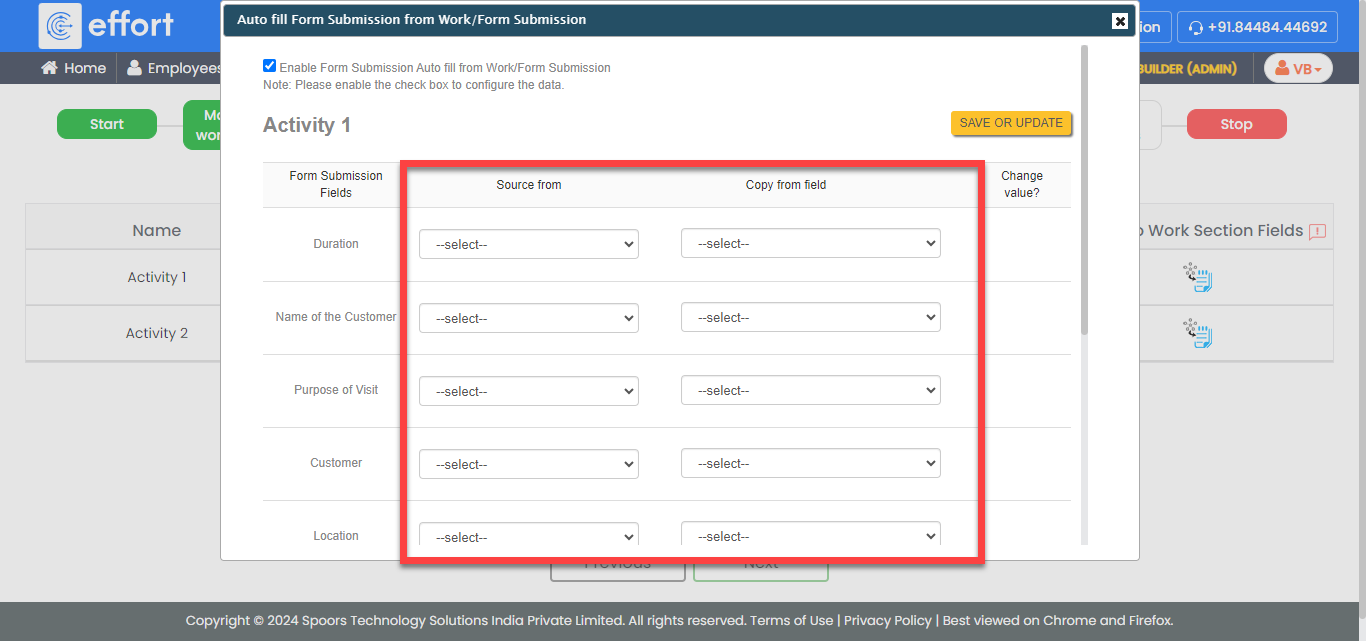
Configure the work fields for the respective form fields.
-
Disable the checkbox under the Change value to
restrict the user to change the value auto copied from work
fields.
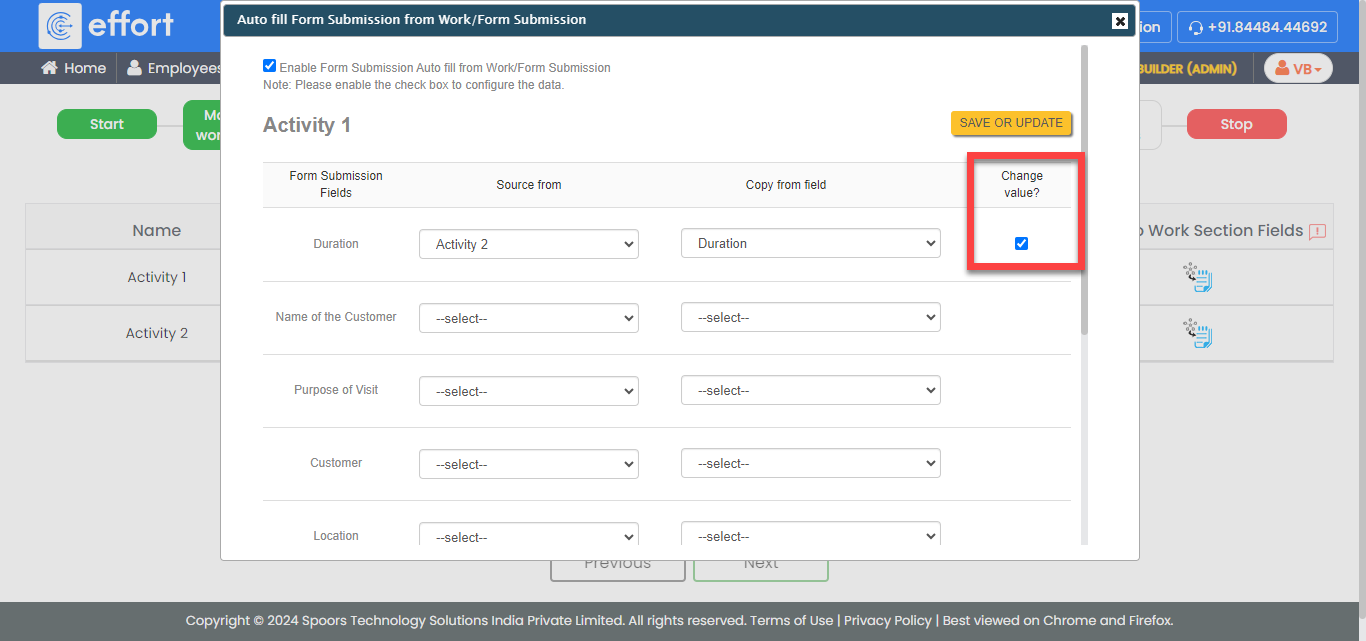
- Click Save Or Update.
-
Similarly, define the configuration for Clone Section
Fields and Clone to Work
Fields.
-
Click Auto Form Fill icon
-
Manage Flow - Configuration: Define the workflow like
start activity, end activity, next activities, etc.
-
Click the checkbox given under the End Activity
column against a work activity to make it an end activity.

-
Click the checkbox given under the End Activity
column against a work activity to make it an end activity.
-
Configure Auto Allocation in the Define Auto
Allocation screen.
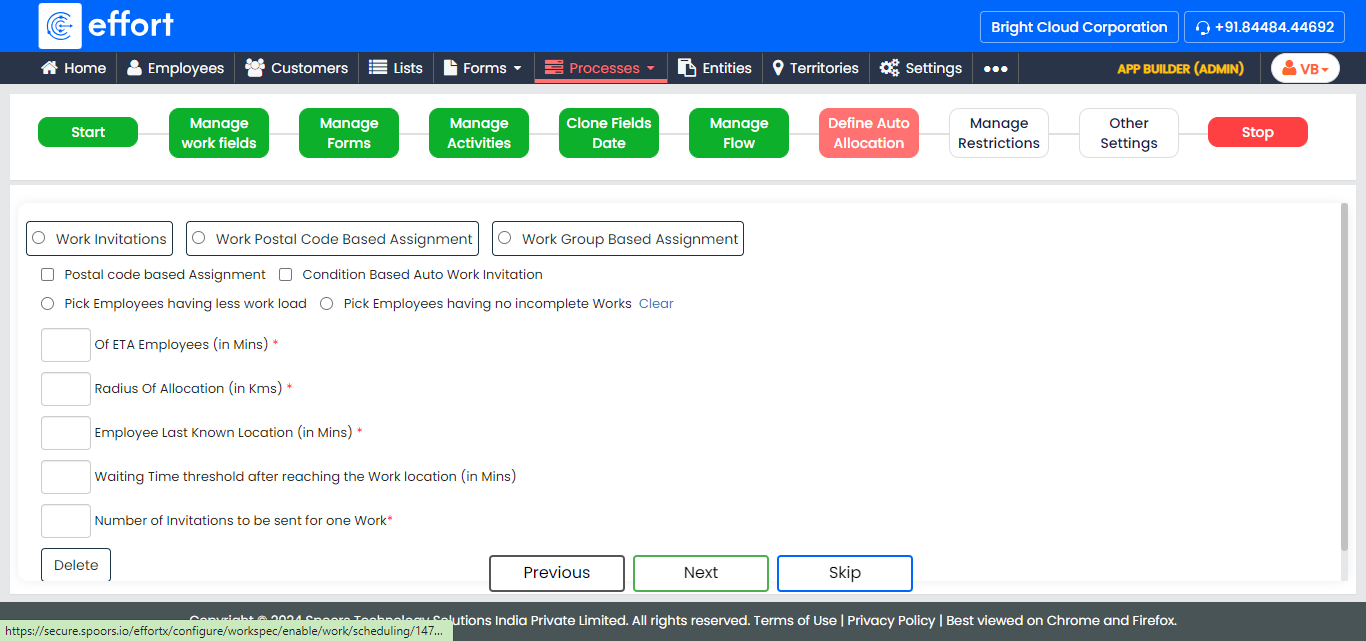
Refer to the Auto Allocate and Scheduling topic to know more about auto allocation. -
In the Manage Restrictions screen, enable the settings
depending on your requirement.

Refer to the Work Settings: Fields and Description topic to know more about the settings. -
Define other settings depending on your requirement.

Refer to the Work Settings: Fields and Description topic to know more about the settings. - Click Complete to finish the work process creation.